- Back Office
- Church Management
- Memberships
- Manage is the main section. We have shown another section under the managesection like manage member.
- Manage Member
- We have shown three modules under Manage Member i.e. Member, Label Print and Member Group.
- Member
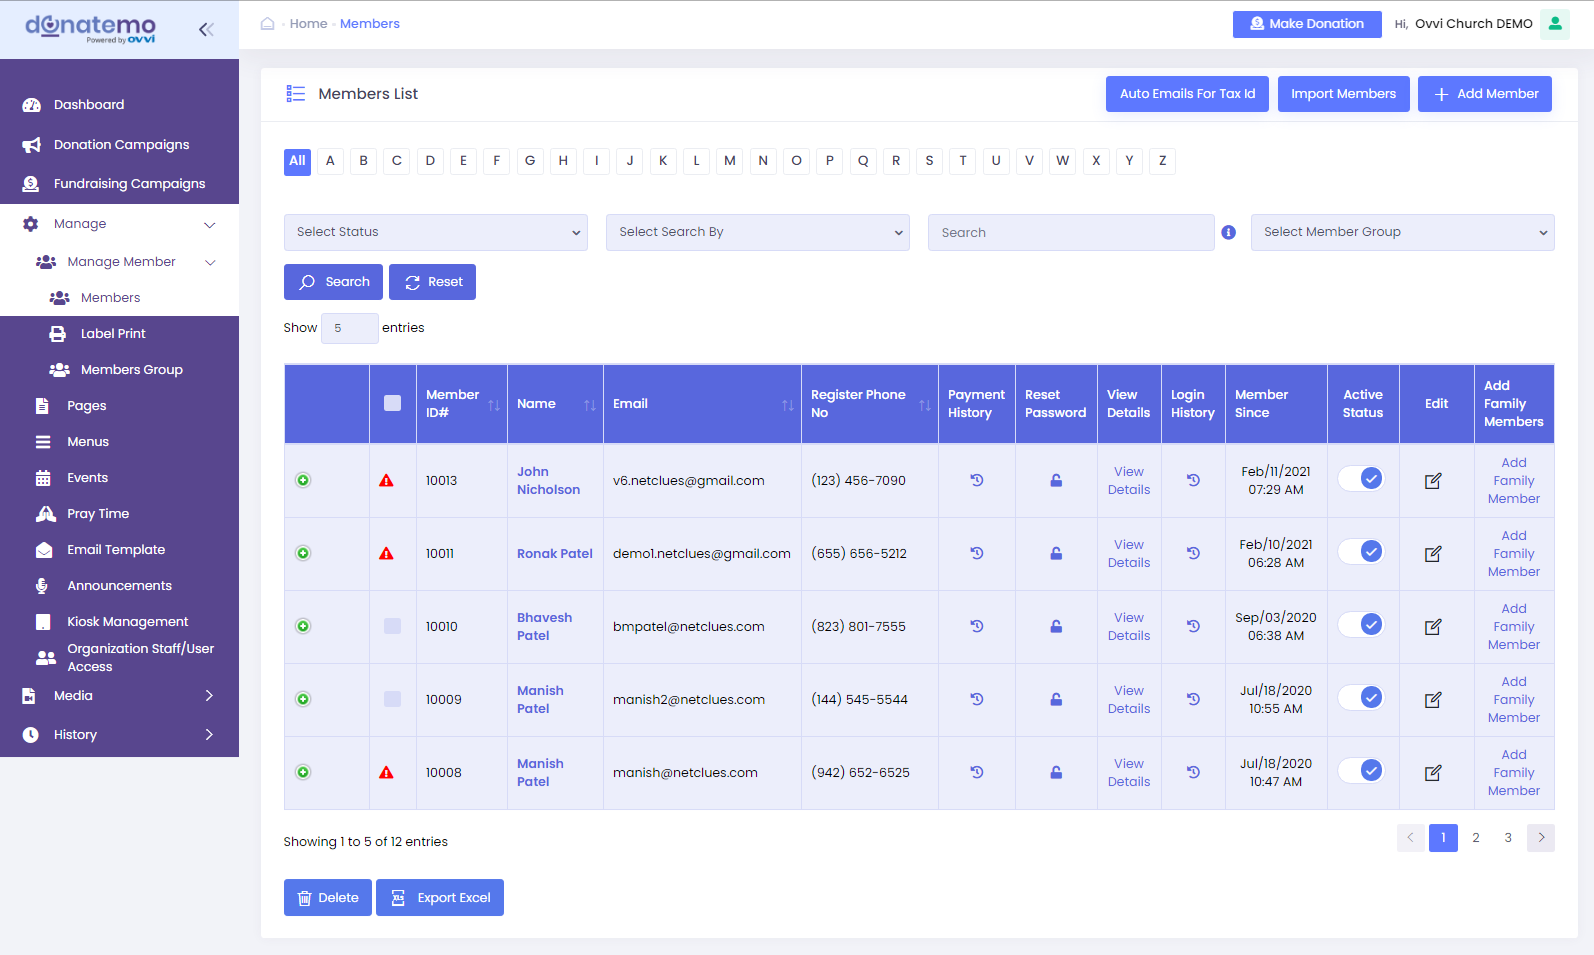
- Member page will get displayed as per above screenshot.
- New family member can be added in two way 1) Plus Sign(+) , 2) AddFamily Member Link
- In these screen at the top right corner there are three buttons “Auto Emailfor Tax Id” , “import members” and “add member”
- Auto Emails For Tax Id: When you click on the button at that time thesystem detects and fire emails to those members who are eligible for anupdated tax id.
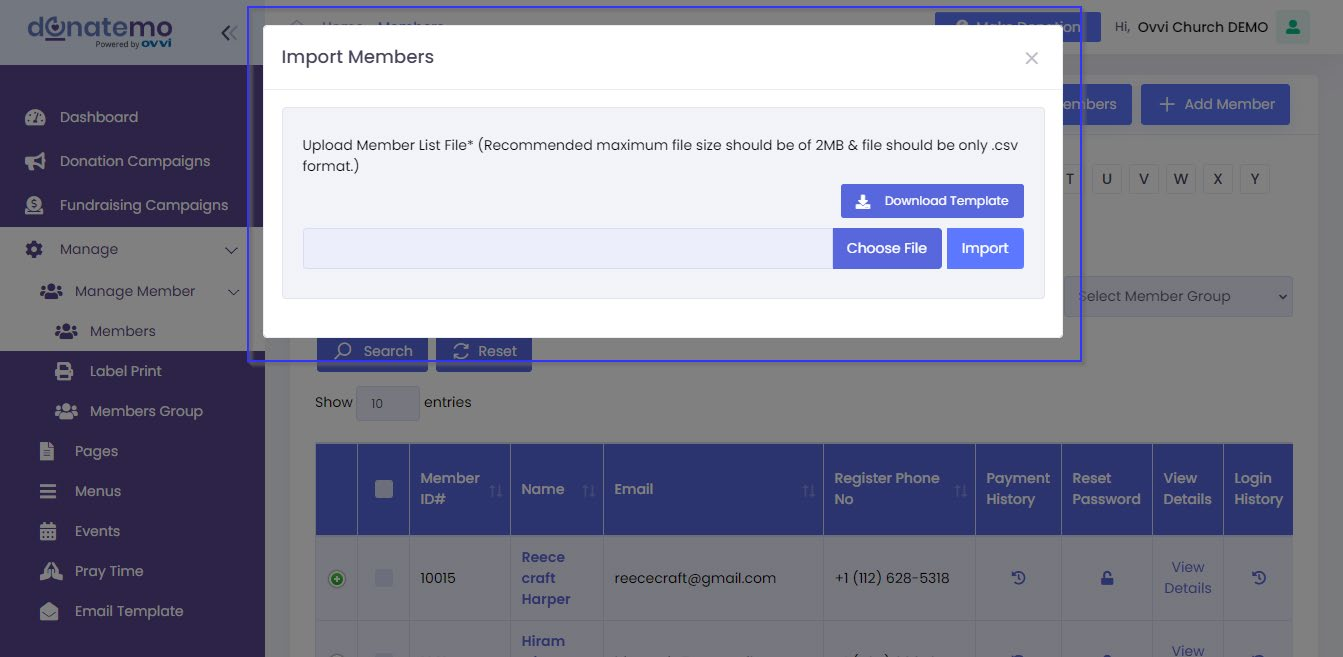
- Import Members: If you want to insert new members in the template firstyou have to click on the “Download Template” button and then insert thedata and save it and then again import the saved file after that the newmember will get imported.Please check the above screenshot.
- Add Member: “Add member” button will redirect to add member pageSome features are as follows:
- In the grid there is a filter by option in which you are able to view all themembers list or by the initial letters you just have to select All or A to Zfilter by will work accordingly.
- On the members list, there are some basic information that will getdisplayed on the grid like Member ID, Name, etc.. for more details click onthe “View Details” link.
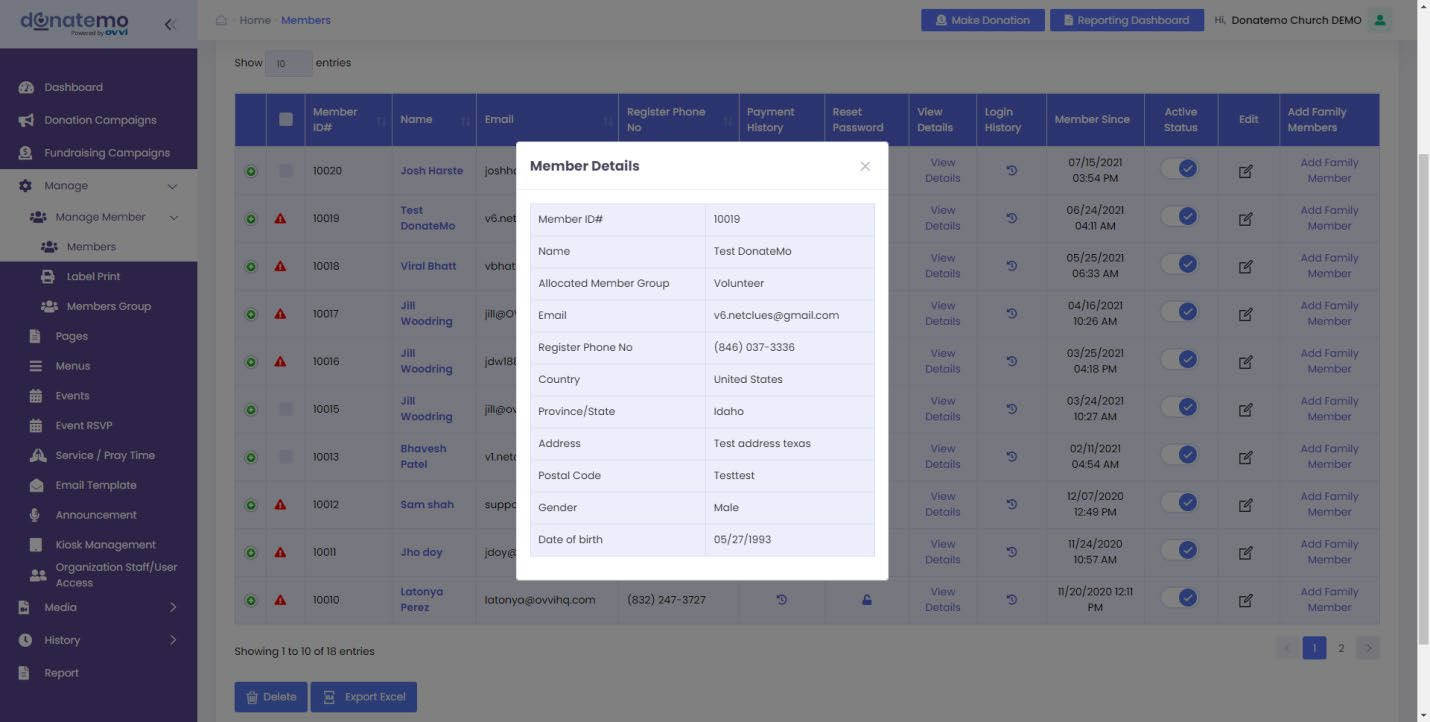
- After click on the “View Details” link, there will displayed the popup ofselected member details.
- All member details are displayed on “Member Details” popup, whichshows all the details when member was created.
- For more details or quick edit the member information click on the “Member Info” icon.
- We can pulled the data for the donation summary by clicking on the “Export Excel” button.
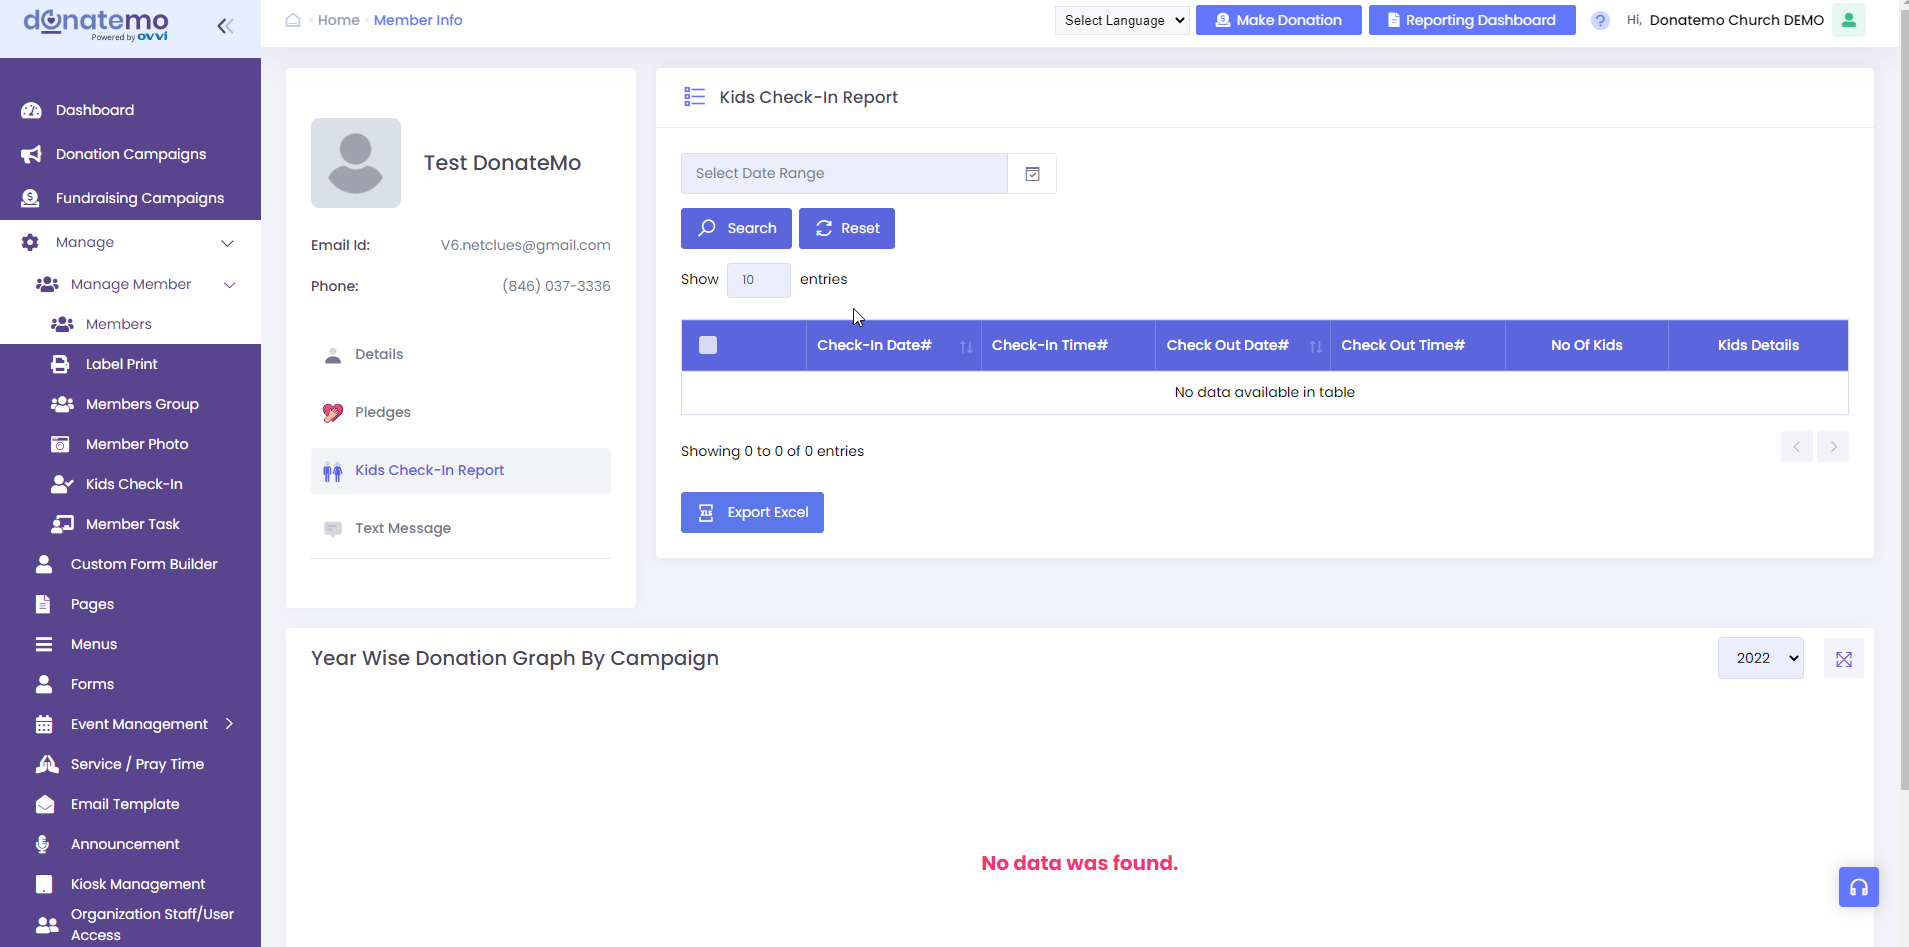
- There are more information displayed on member info page like Member full details, Pledges of donation, and kids check-in report.
- There are three sections are displayed on the member information page.
-
- Details
- Pledges
- Kids Check-in Report
- Text Message
-
- Details: First section displayed the short member information and quick links for donation pledges, kids check-in report.
- Whenever click on the quick links second and third section will be refreshed.
- For Details section, there are Main Informationand Family Information section are displayed.
- On main information there are all information are displayed of the member.
- On family information section there are family related information will be displayed of this member.
- Below of the family information there is group related information is displayed.
- If member is linked to any group then allocated group information is displayed.
- Pledges: Member can add the pledges for donation and set the target donation.
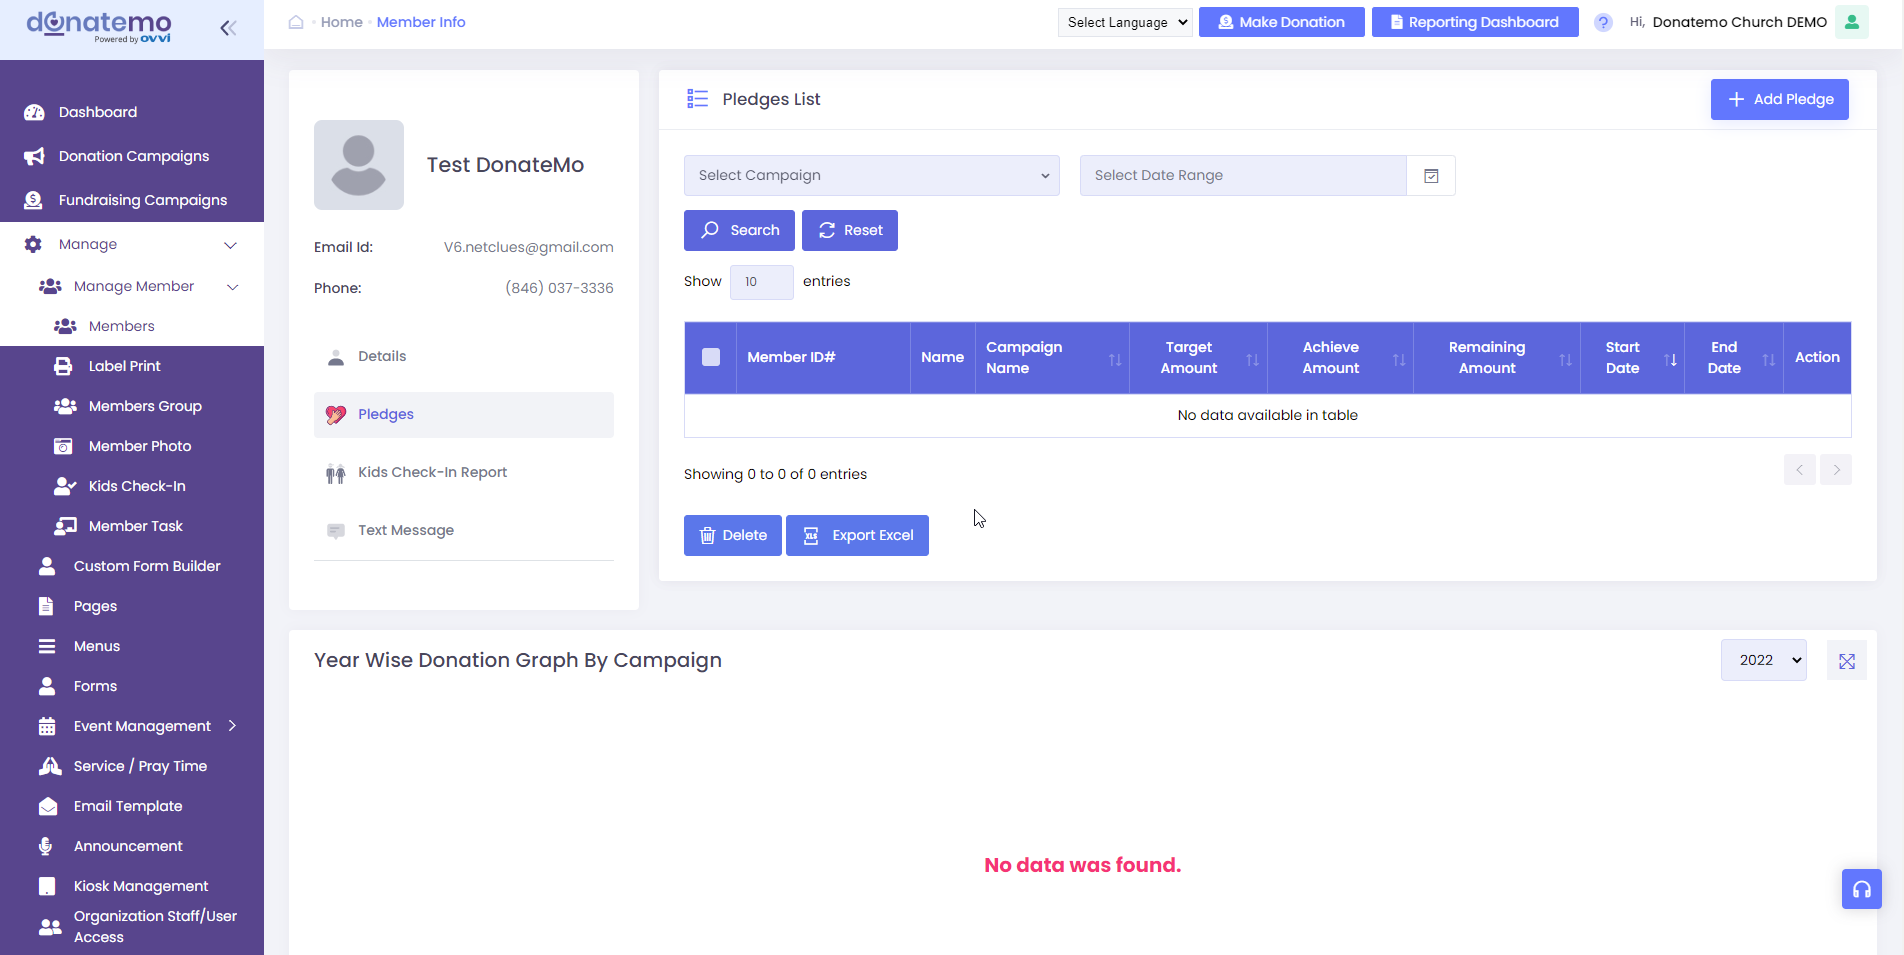
- As per see the above screen, there is displayed the pledges list.
- To add pledge by click on the “Add Pledge” button.
- Whenever click on the “Add Pledge” button, it will redirects to add pledges page.
- Add pledge page look like below screen.
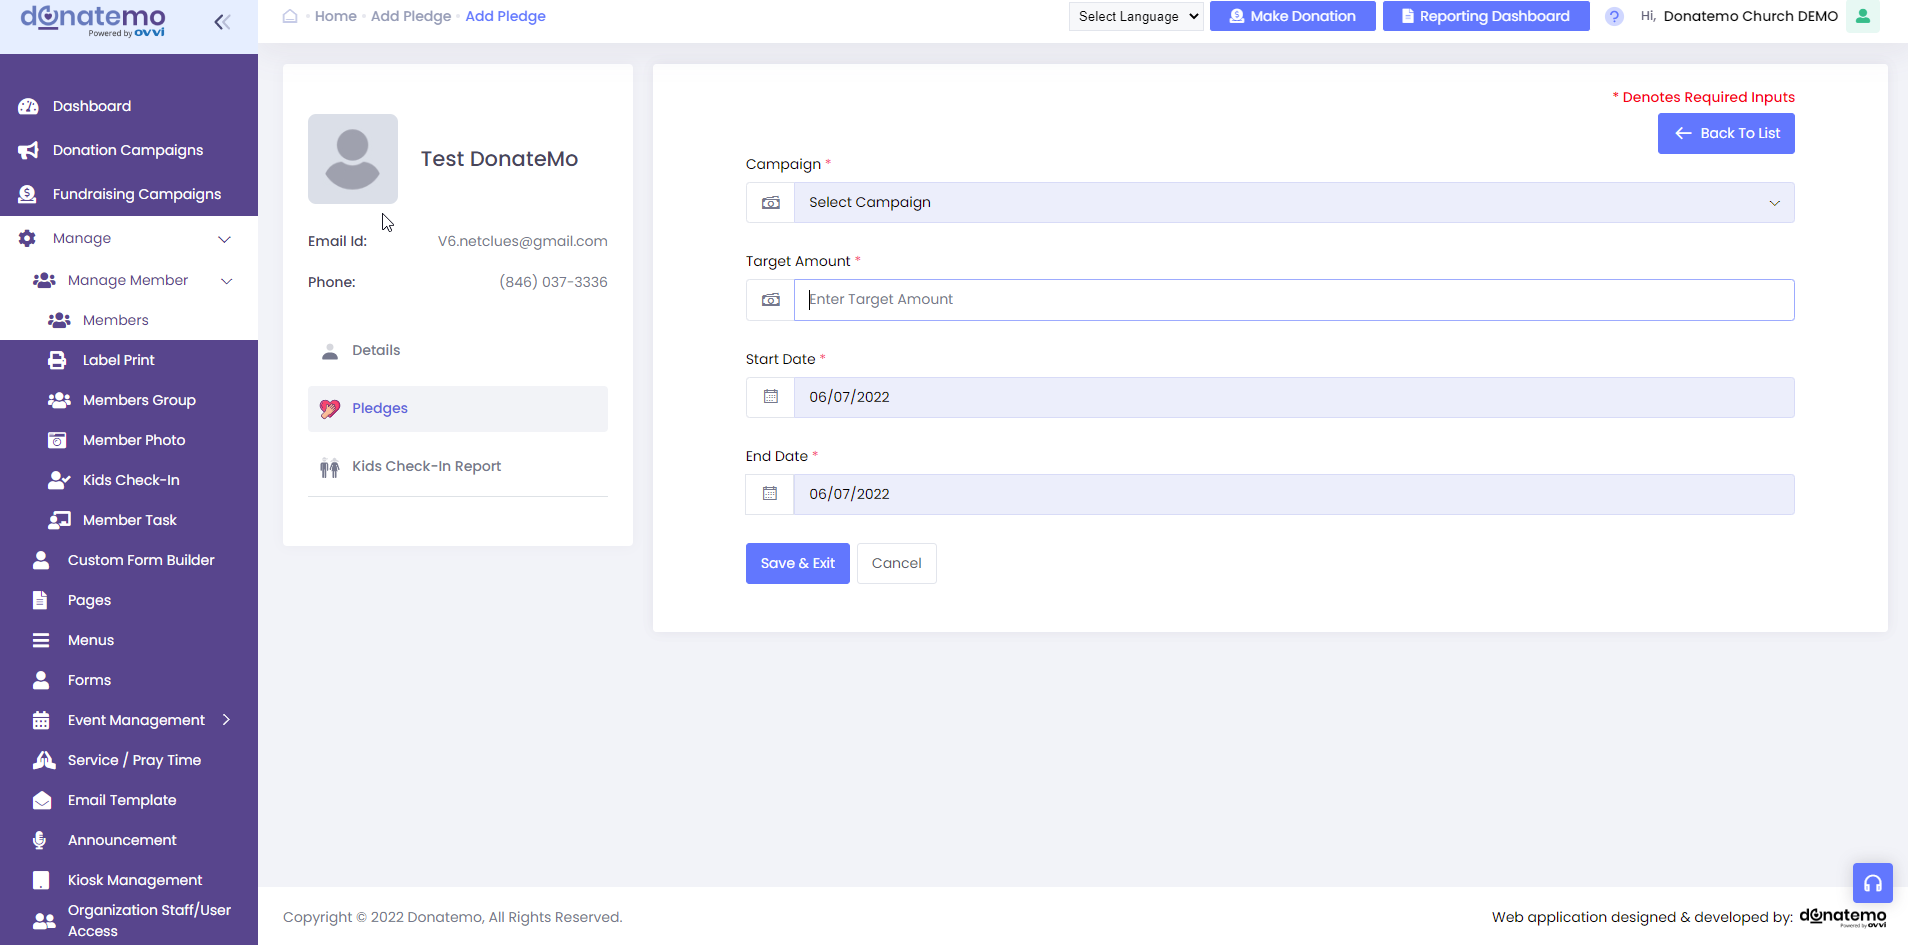
- There are pledges related fields are displayed on the add pledge page.
- On add pledge page there are some fields information like Campaign, Target Amount, Start Date, and End Date.
- On pledges list page, there is filter options available like select campaign, date-range.
- To displayed the payment history, click on the payment history icon of thegrid.
- After click on the payment history icon, it will redirected to payment historypage and automatically filter the payment history for the selected member.
- To reset the password for any member, choose the member and click onthe Reset password grid icon.
- After click on the Reset Password icon, displayed the popup for sent resetpassword link on selected member email.
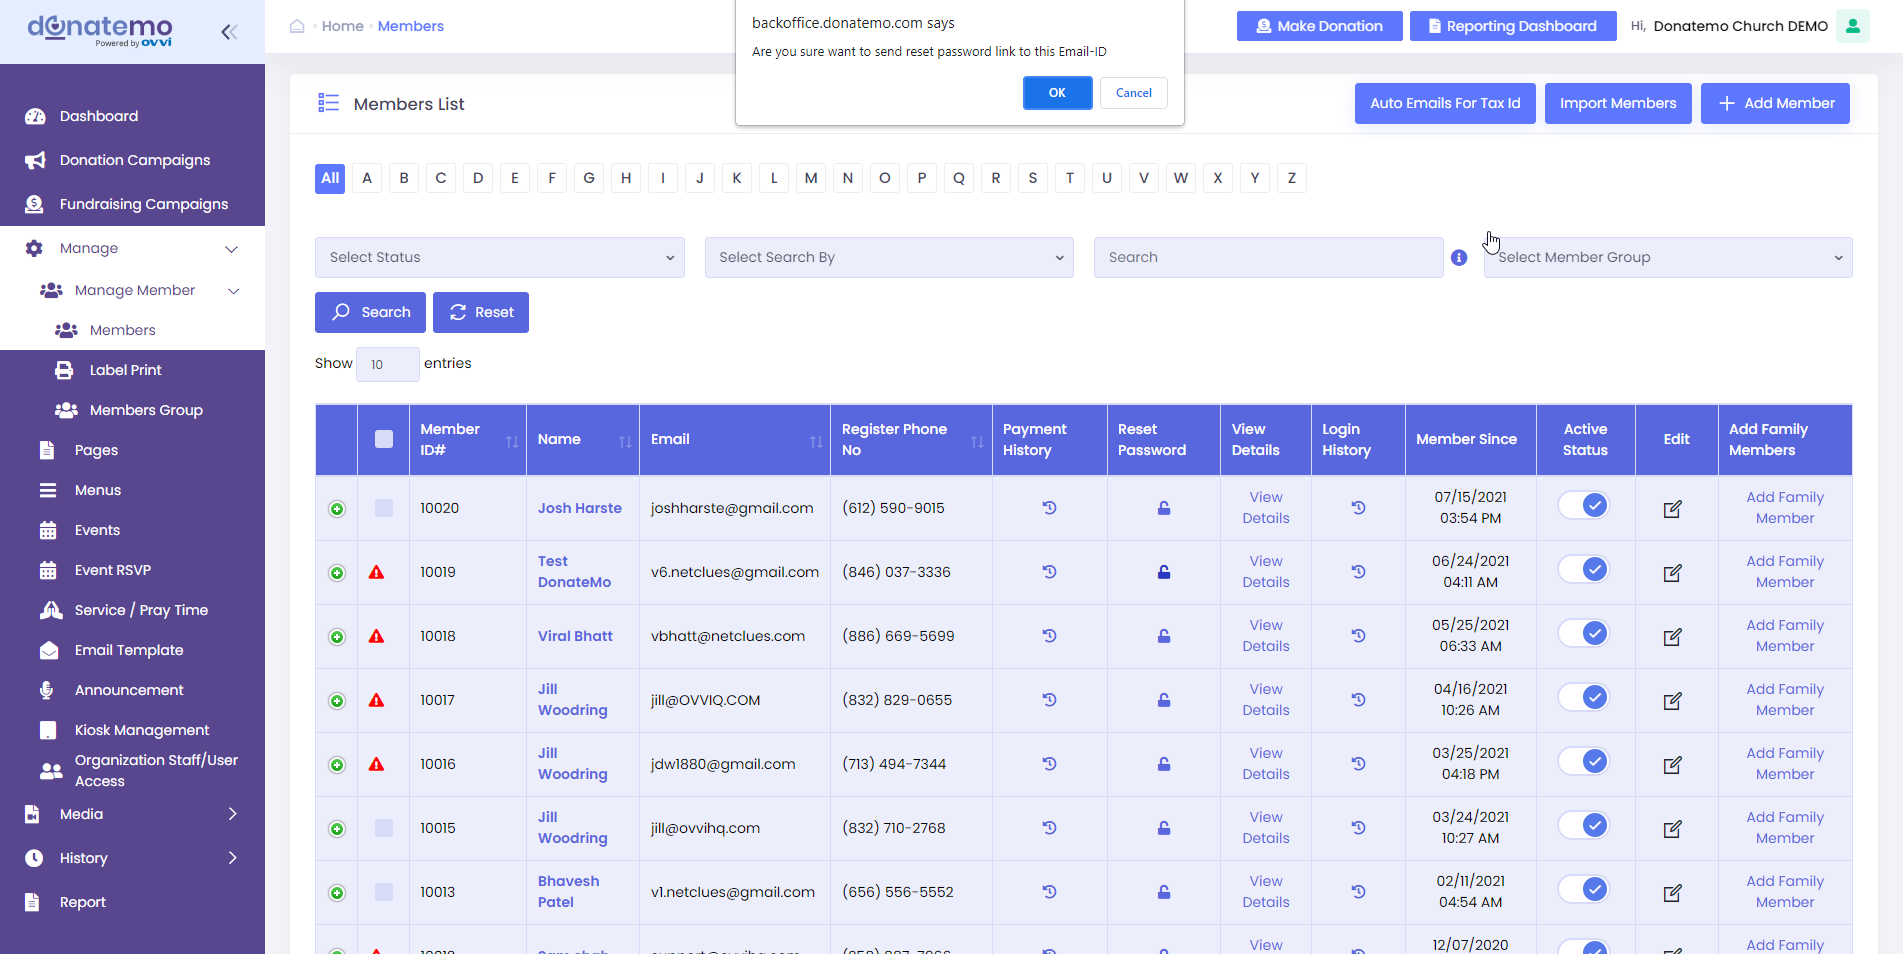
- As you can see the above screenshot the popup is to confirm that send an email to the member to reset the password.
- To view the login history for any member, click on the login history icon ofthe grid.
- After click on the login history icon, it will redirect to login history page andautomatically filter for selected member login history.
- Active or inactive status filter :- Filter by active or inactive list.
- To edit any member, click on the edit icon of the member.
- Kids Check-in Report: Member can view his/her kids check-in report on her account.
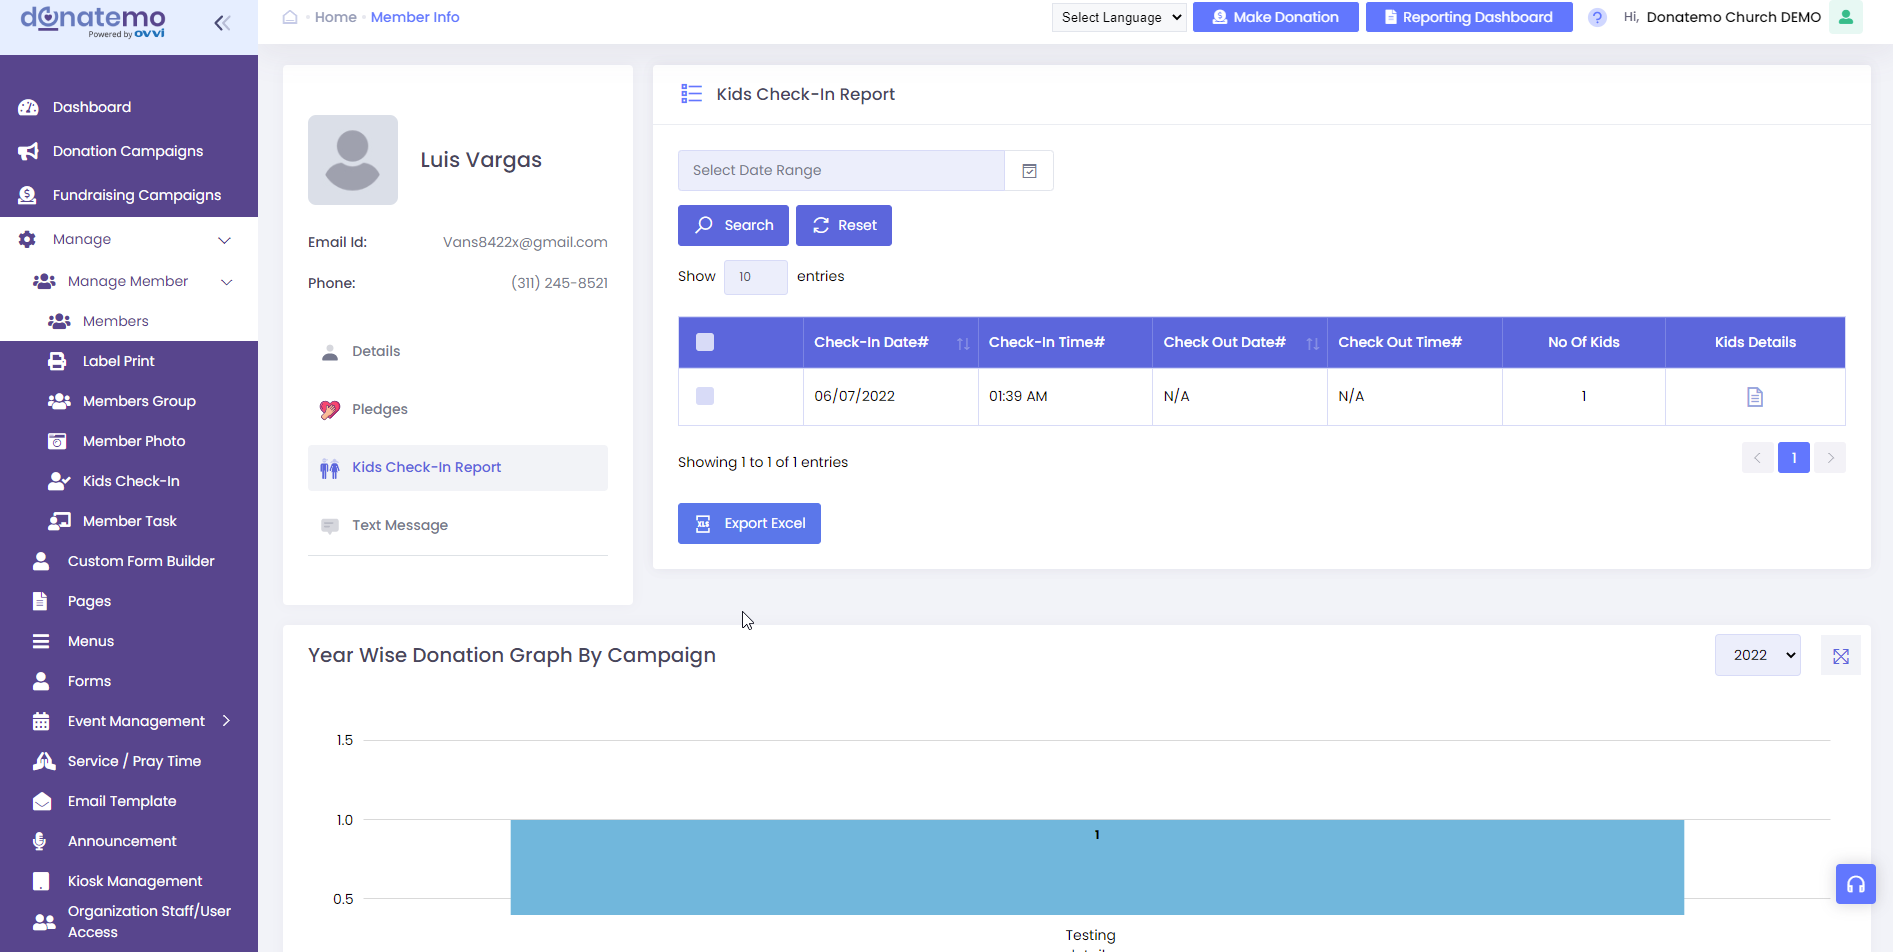
- On kids check-in report page, there are displayed the information related to kids check-in report.
- There is date-range filter available on the kids check-in report.
- On the kids check-in report grid information displayed like check-in date, check-in time, check-out date, check-out time, no of kids, etc…
- User can pull the data by clicking on the “Export Excel” button.
- Text Message: On this module send a text message to member on scheduled, custom schedule time, and immediate send message.
- Schedule message like
- After 3 hours
- After 6 hours
- After 8 hours
- Custom schedule
- Immediate send
- Below of the send text message section, there is displayed the text messages history.
- All send text messages are displayed on the messaging history.
- Messaging history section, there are displayed the all send text messages.
- Messaging history displayed the information like from number, to number, message, status, scheduled message date time, etc….
- On messaging history section, there is option for export as excel.
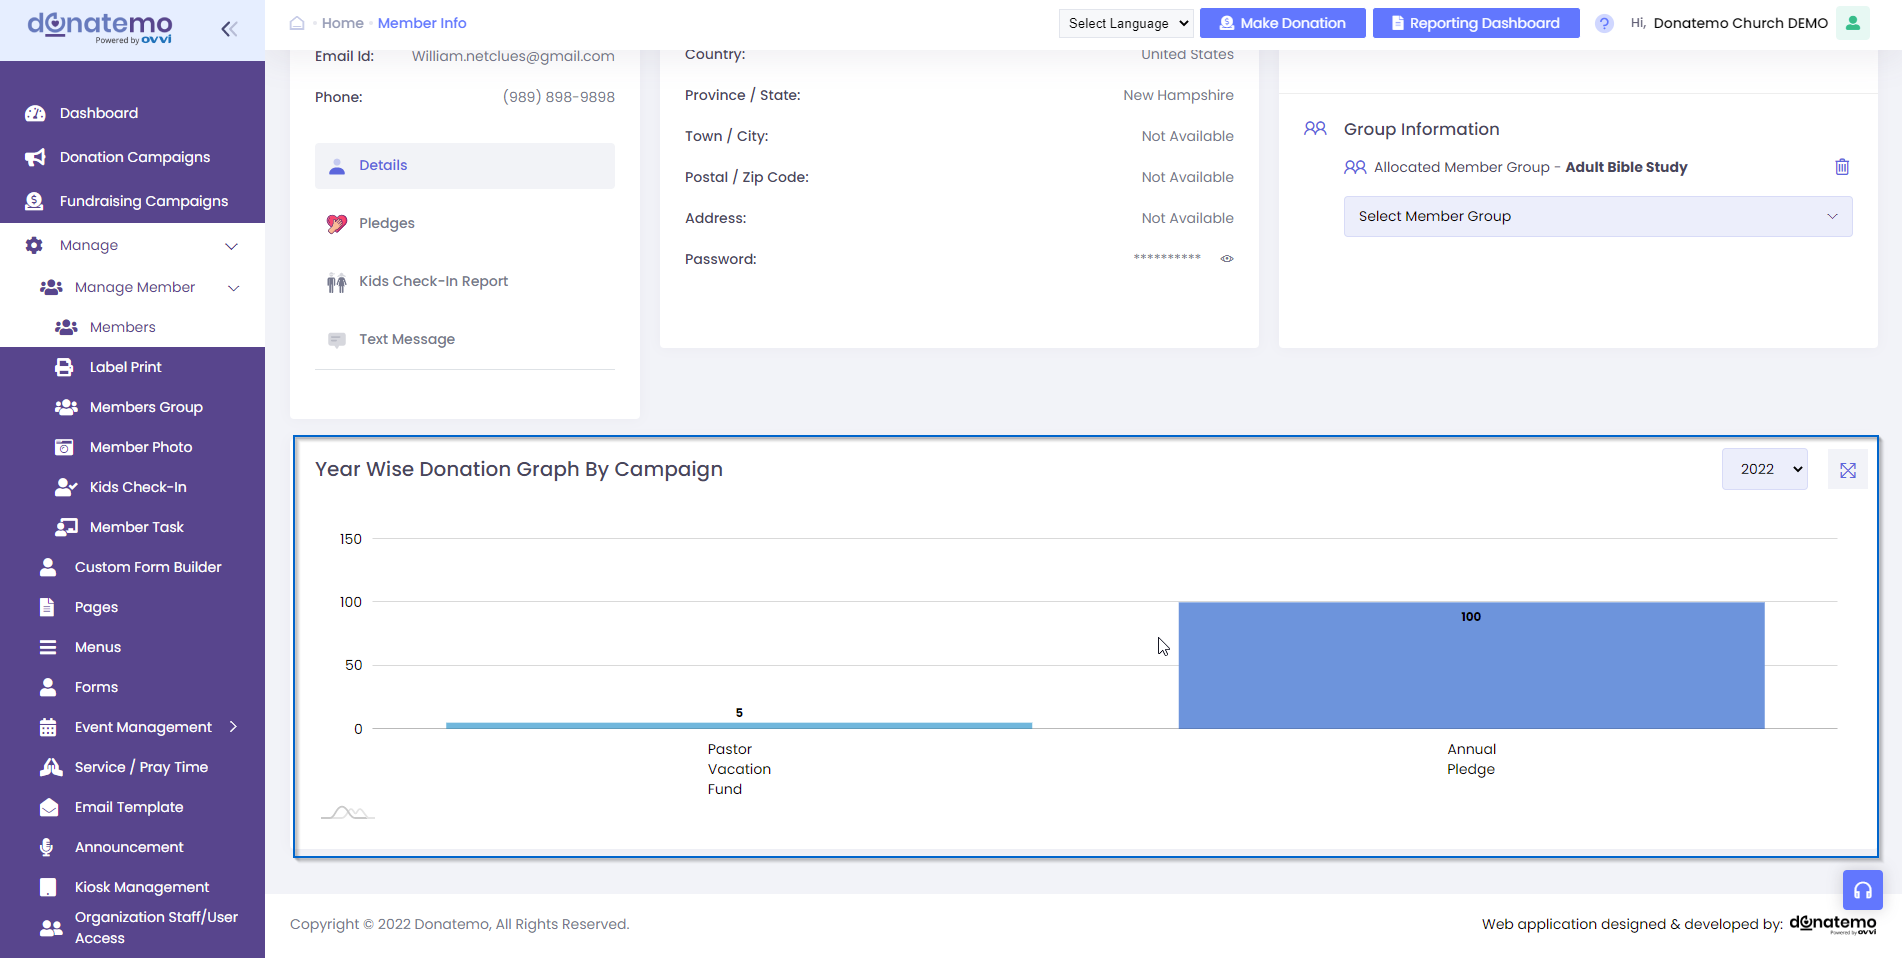
- Year Wise Donation Graph By Campaign: This report is displayed on the member module member info page.
- This report represent that the year wise donation by campaign.
- This report rendered as a bar graph.
- We can shows the total donations by campaign wise for particular member.
- To details graph, click on the expand icon for detail graph show.
- As per see the above screen shoot, there is graph will be displayed as highlighted portion.