- Back Office
- Church Management
- Custom form builder module used for member field customizing for member, form customizing like member review form, assessment form, etc…
- A) Customize Member fields

- As per the above screenshot is the Custom Form Builder module.
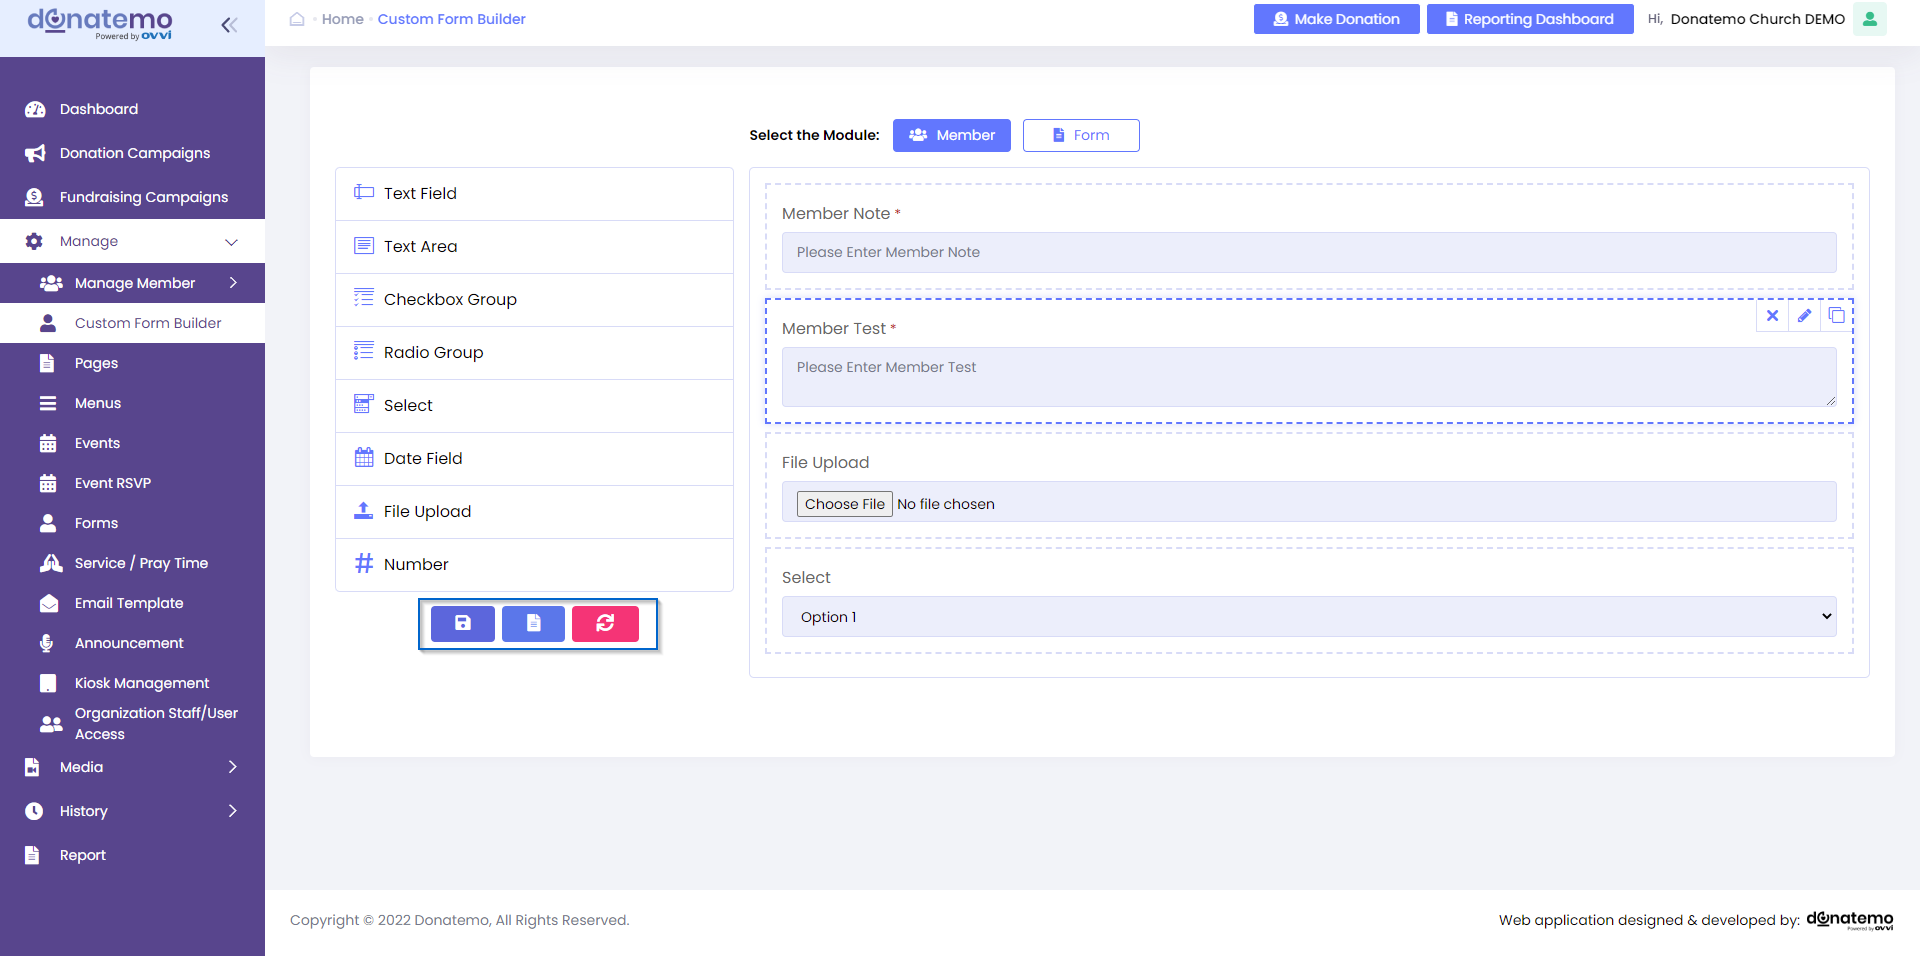
- On top of the page there are two options are available for Memberand
- Bottom of the module selection there are field customization sections are displayed.
- Left section represent is collection of the field selection.
- Right section represent is the customization fields section.
- We have to drag or just one click the field element from the left side to right side section for add the new elements on customization the member or form module.
- We can also drag the elements from up to down or down to up on right side section for field arrangement.
- All our customization field arrangements are reflected on front side.
- On the above screenshot, highlighted element of the right side section, there are some options are available like edit, delete or copy of the selected field.
- To delete any field, just click on the delete icon of the field element on the right side section.
- To edit the field information, just click on the edit icon of the field element on the right side section (Refer to the below screenshot).
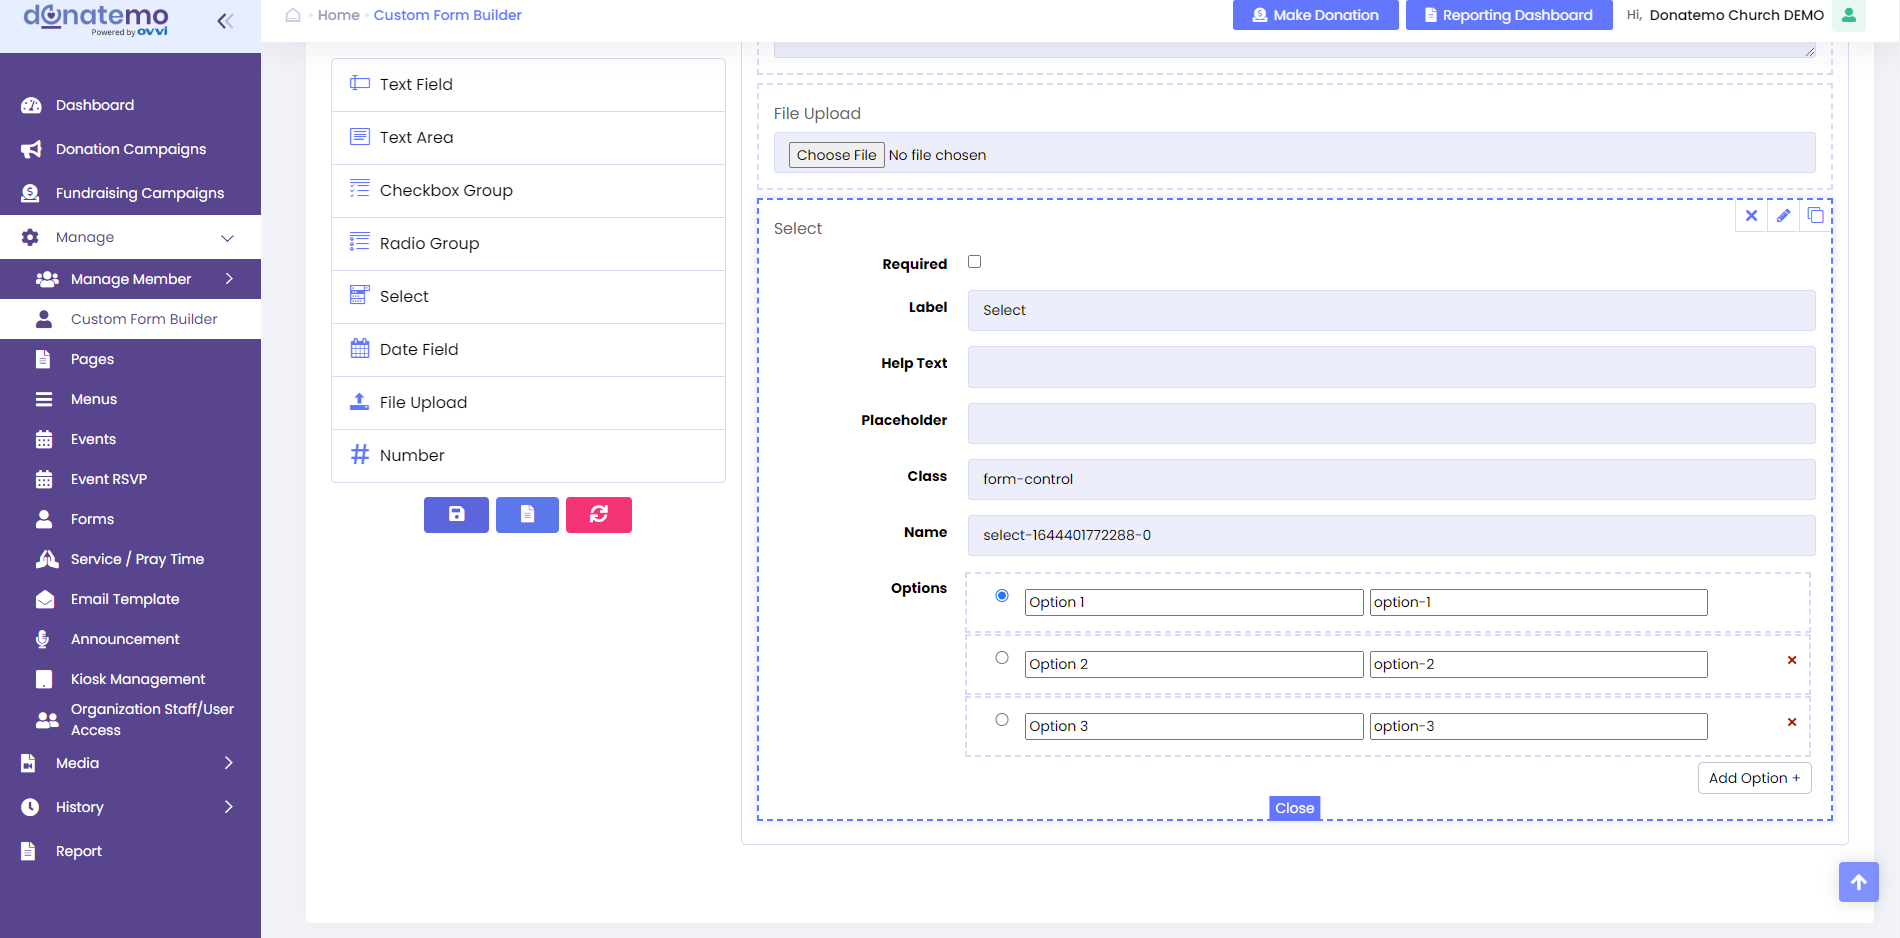
- After clicking on the edit icon, edit field information popup will be occur as per the above screenshot.
- We can change field information like label name, help text, placeholder text, option name and values, etc….
- On the left side bottom of the collection field section, there are three button are displayed to Save, Default field selection, and clear.
- After completed the all customization, it’s required to save the architecture of the field customization by clicking on the Save button.
- Now let’s see how the fields reflection on front or member module.

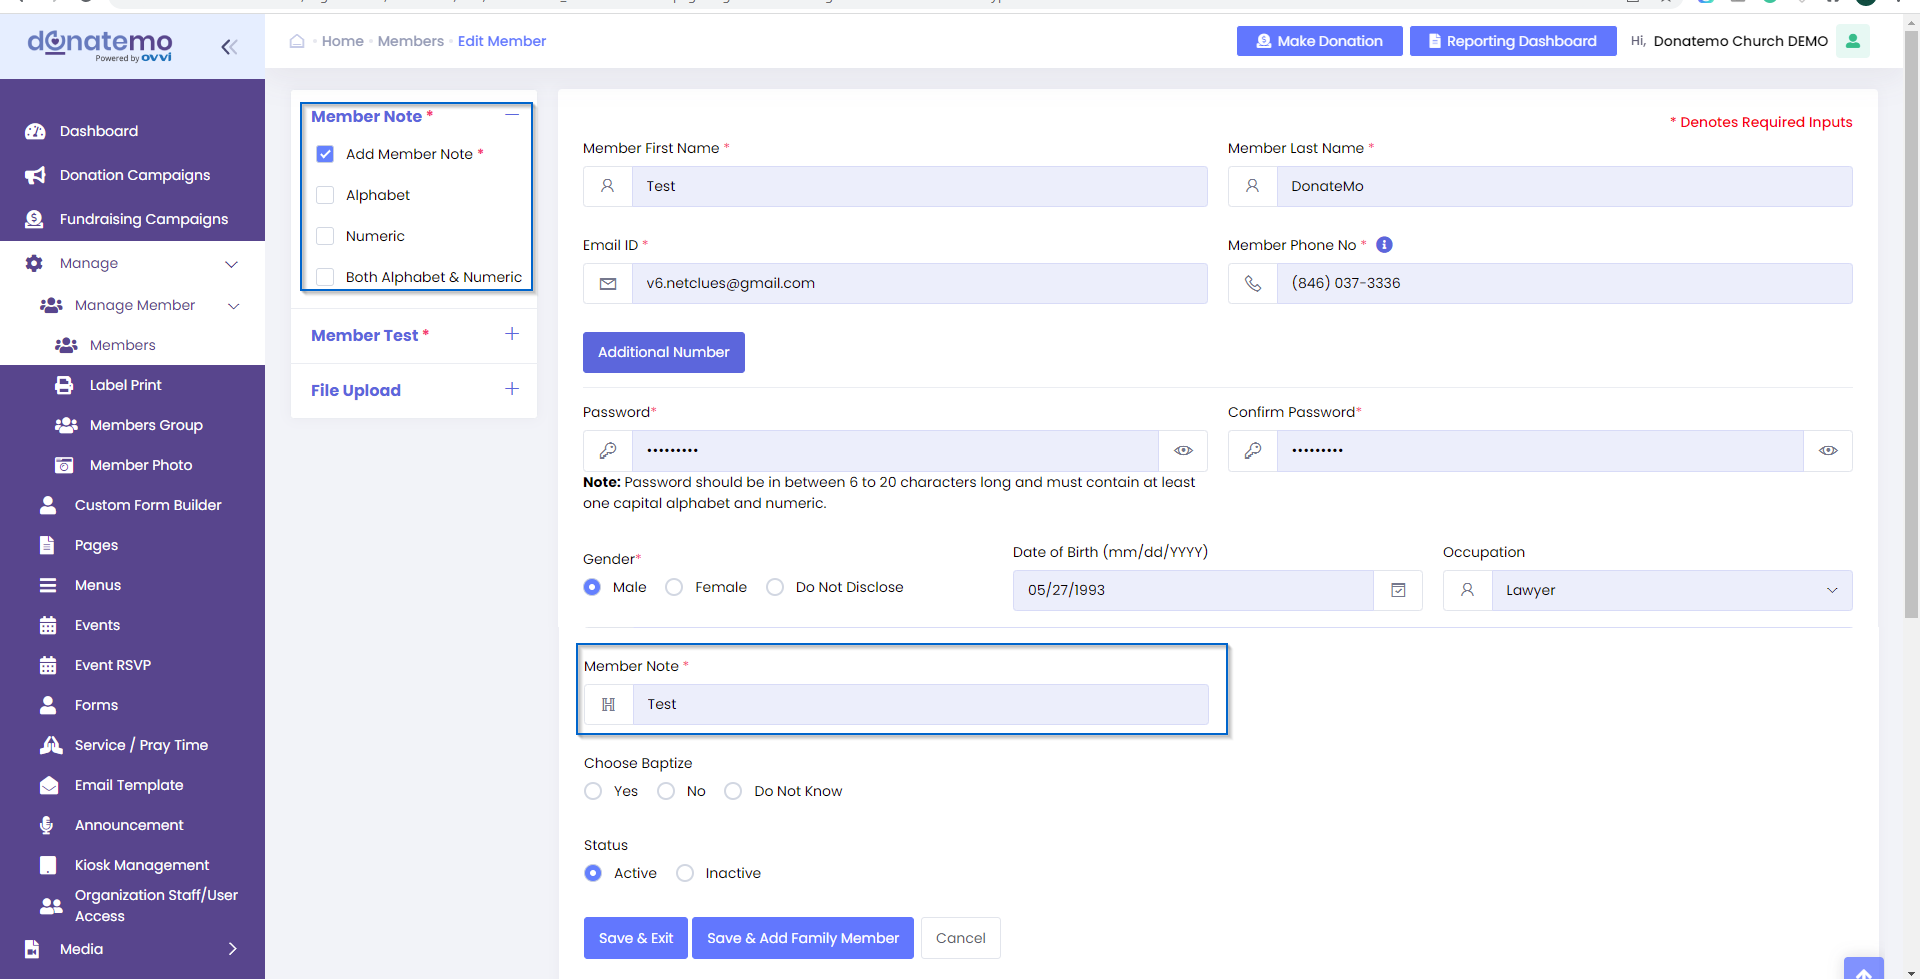
- As per the above screenshot, all member’s customized fields are occurred on the left side section.
- If we want to add some fields on particular members then we have to check this field of the left section.
- Whenever we will check the checkbox of the left side field, then this field make an element on the right side section.
- So after that we can edit the value of customized field for the member (Refer to the below screenshot).
- B) Customize Member Forms:
- Customize member forms same as customize member module fields.
- First choose the Form module on top of the page of customization.
- Then add the fields from left side for customization the form.
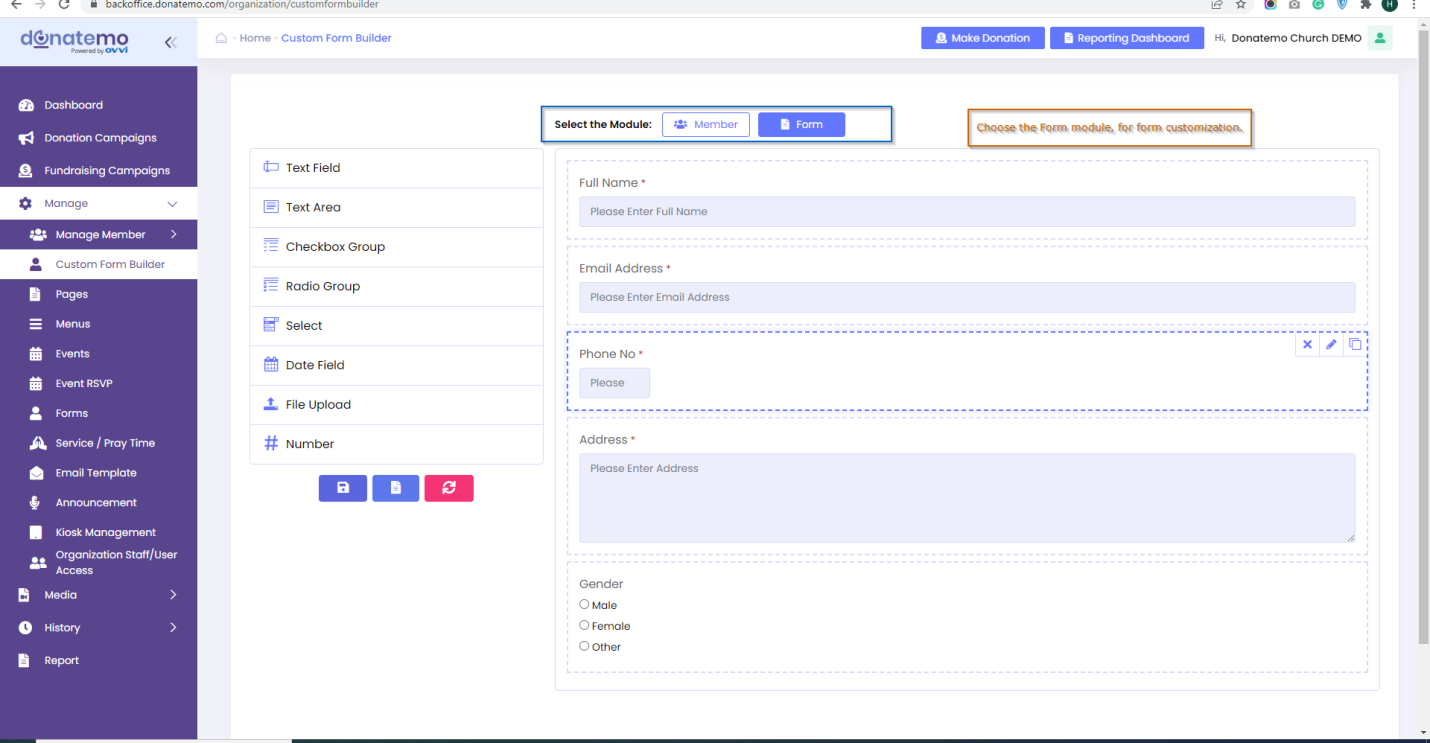
- We can add more fields on the form module customization same as member module customization.
- After architect the forms module, all fields are reflection on the forms module whenever create a customize form (Refer to the below screenshot).
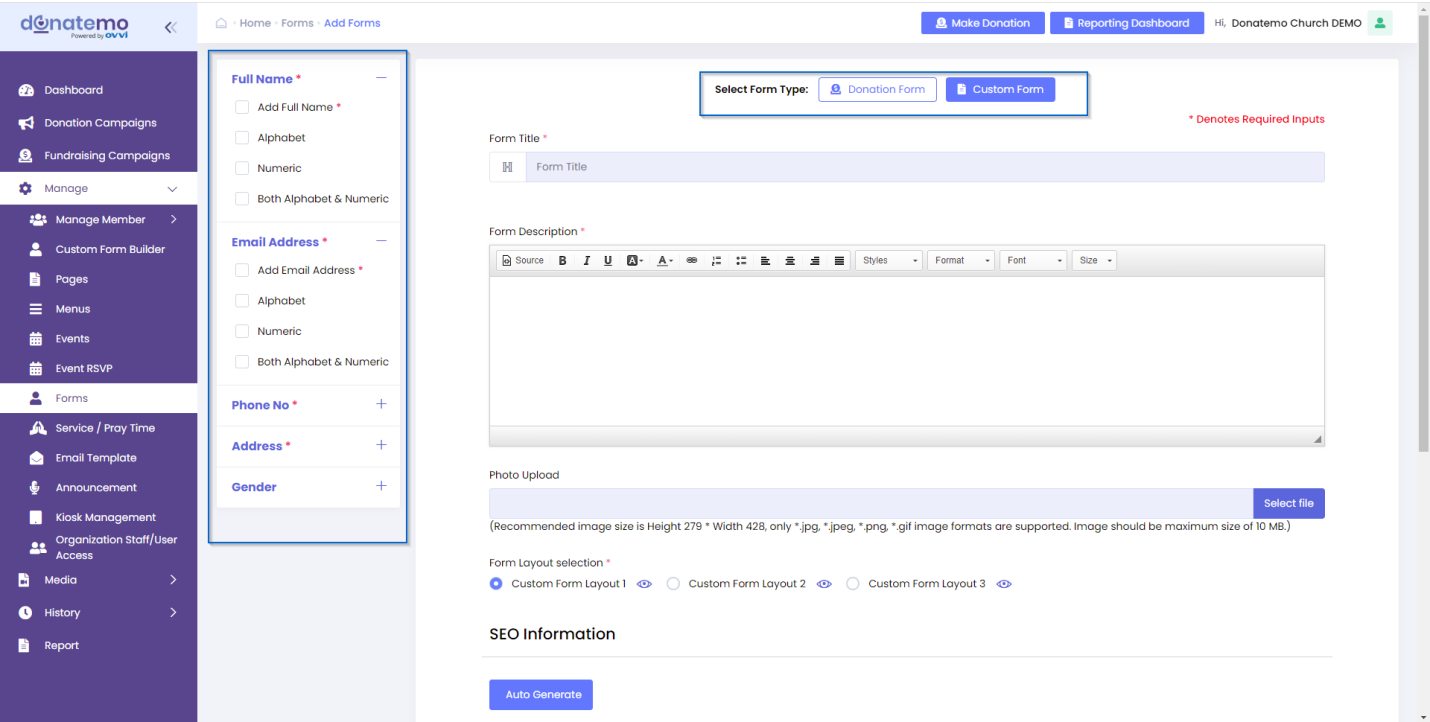
- So as per the above screenshot, all customized form fields are occurred on the left side section of the Custom Form type Forms module.
- Here we can add some specific fields whenever create a custom form (Refer to the below screenshot).
- So whenever we want add some fields, click on the checkbox of the left section at that time element will be created on the right side for selected field.
- After completing the customization of the custom form Save the form for further reference.
- Forms process flow are explained below of Forms module explanation.