- Back Office
- Church Management
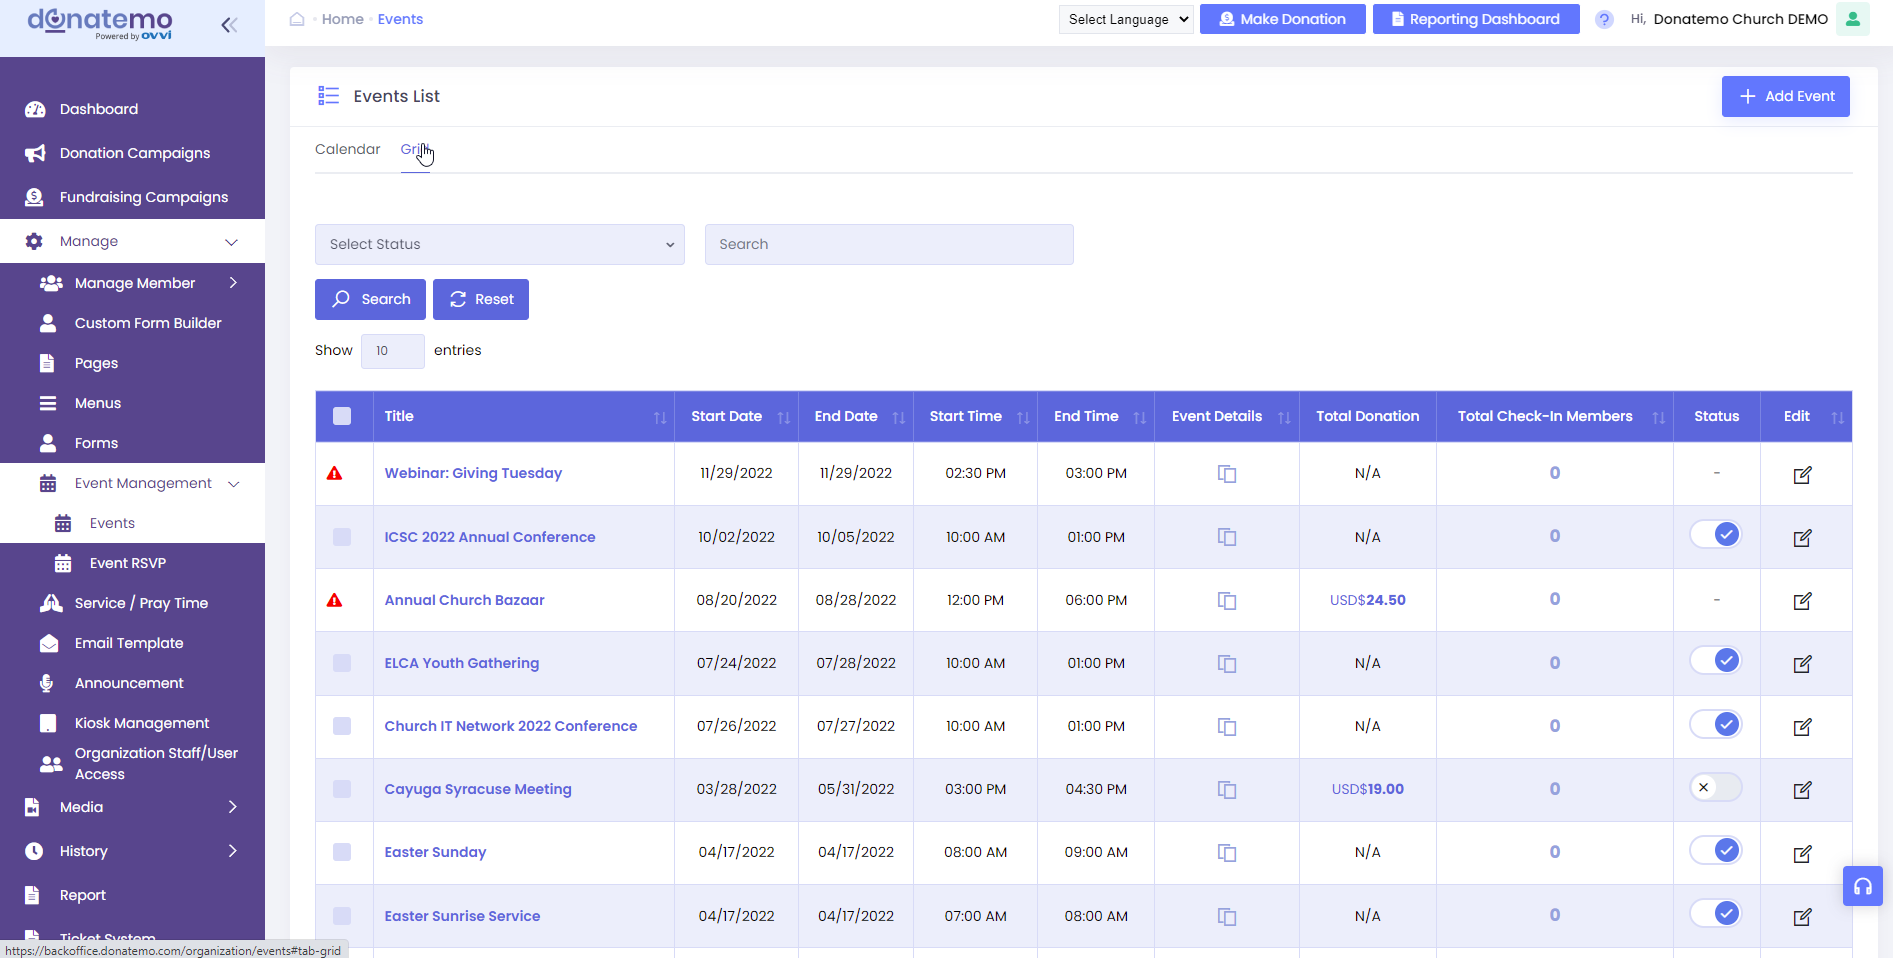
- As per see the above screen, there are two options available for displayed an events.
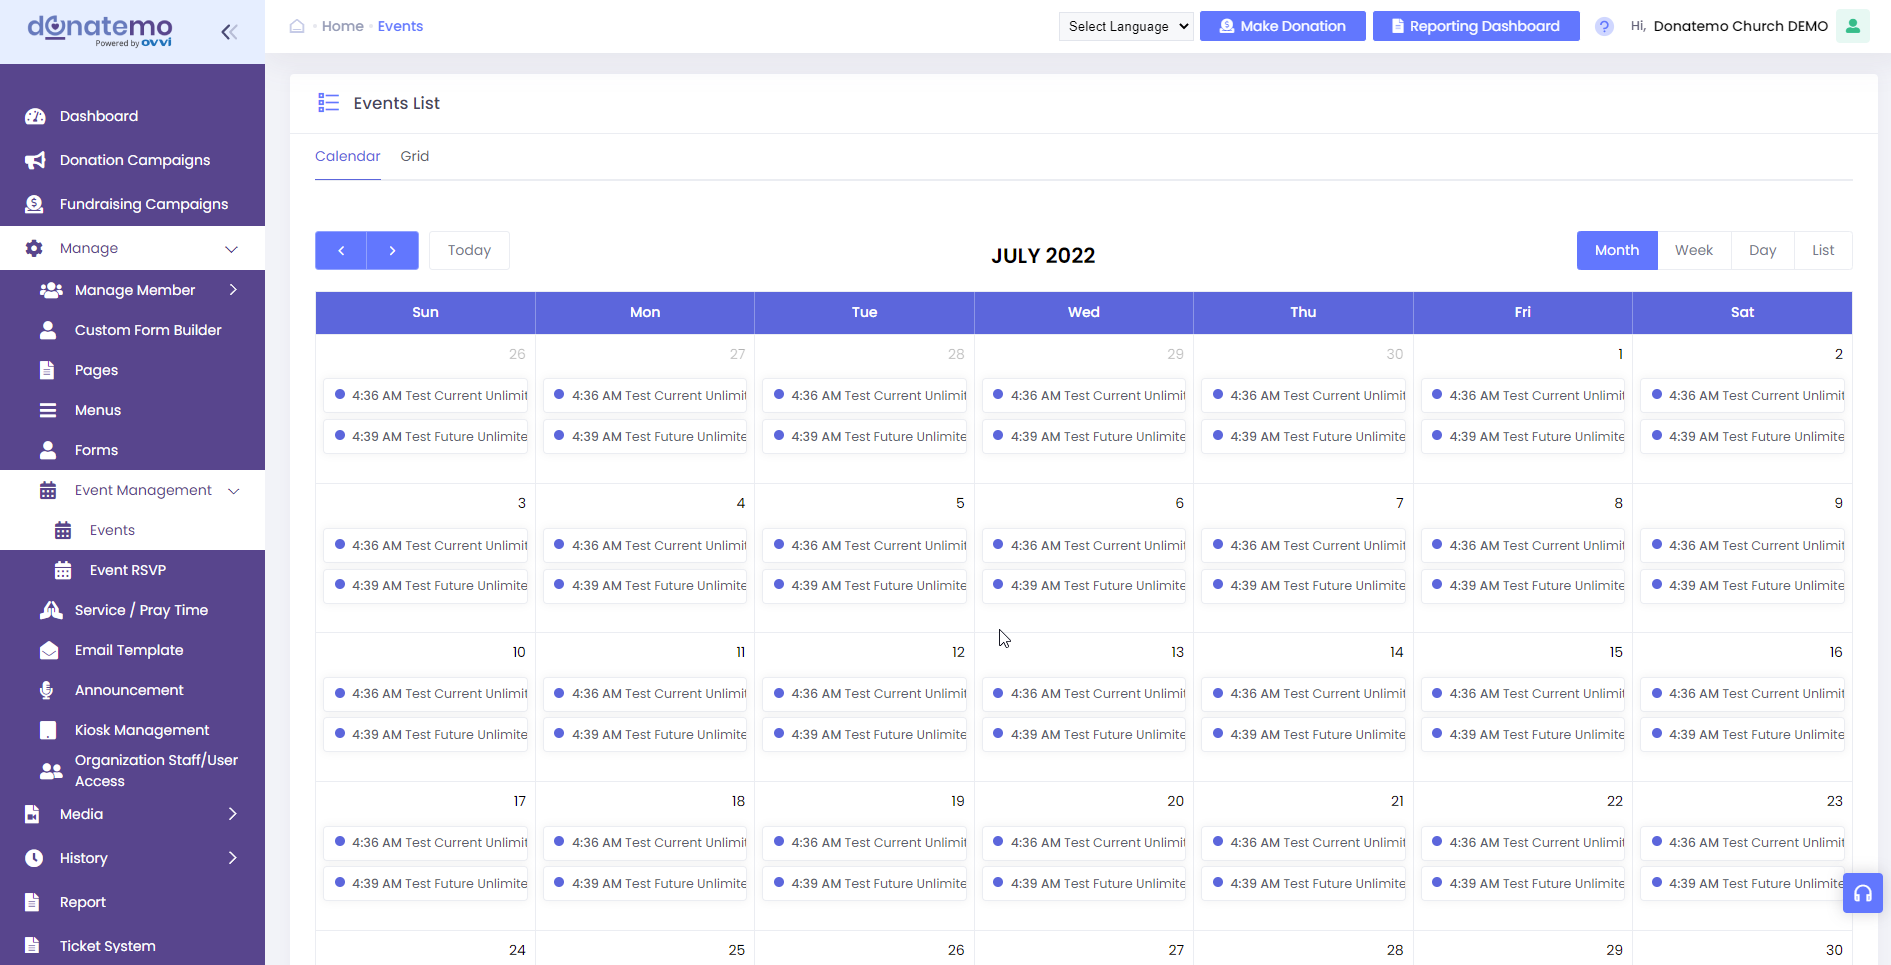
- Event Calendar
- Event Grid
- Event Calendar: There are displayed all the events on the calendar for all day events and specific date event.
- We can create an event by clicking on the calendar box and update an event by clicking on the event stripe on the box.
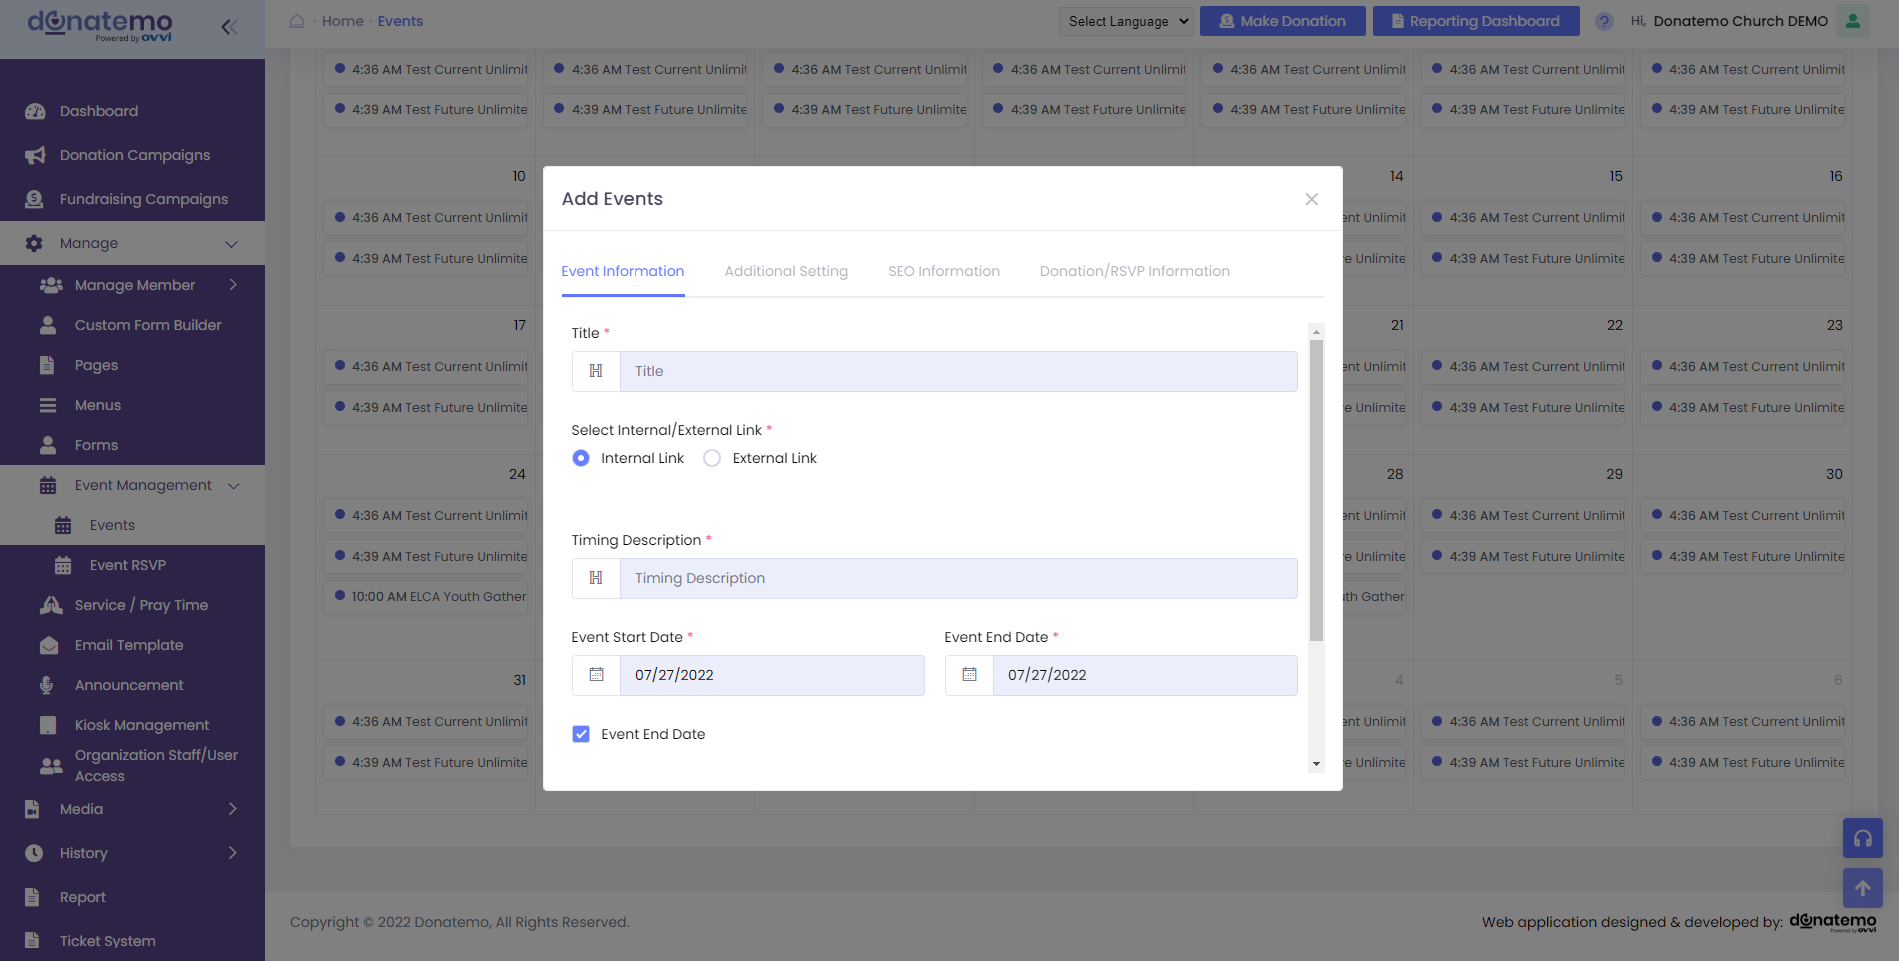
- On the create event popup there are four tab to create an event.
- Event Information
- Additional Setting
- SEO Information
- Donation/RSVP Information
- On the grid page for create an event click on add event fill up all the required fields and then click on Save & Exit Events will get added in the grid.
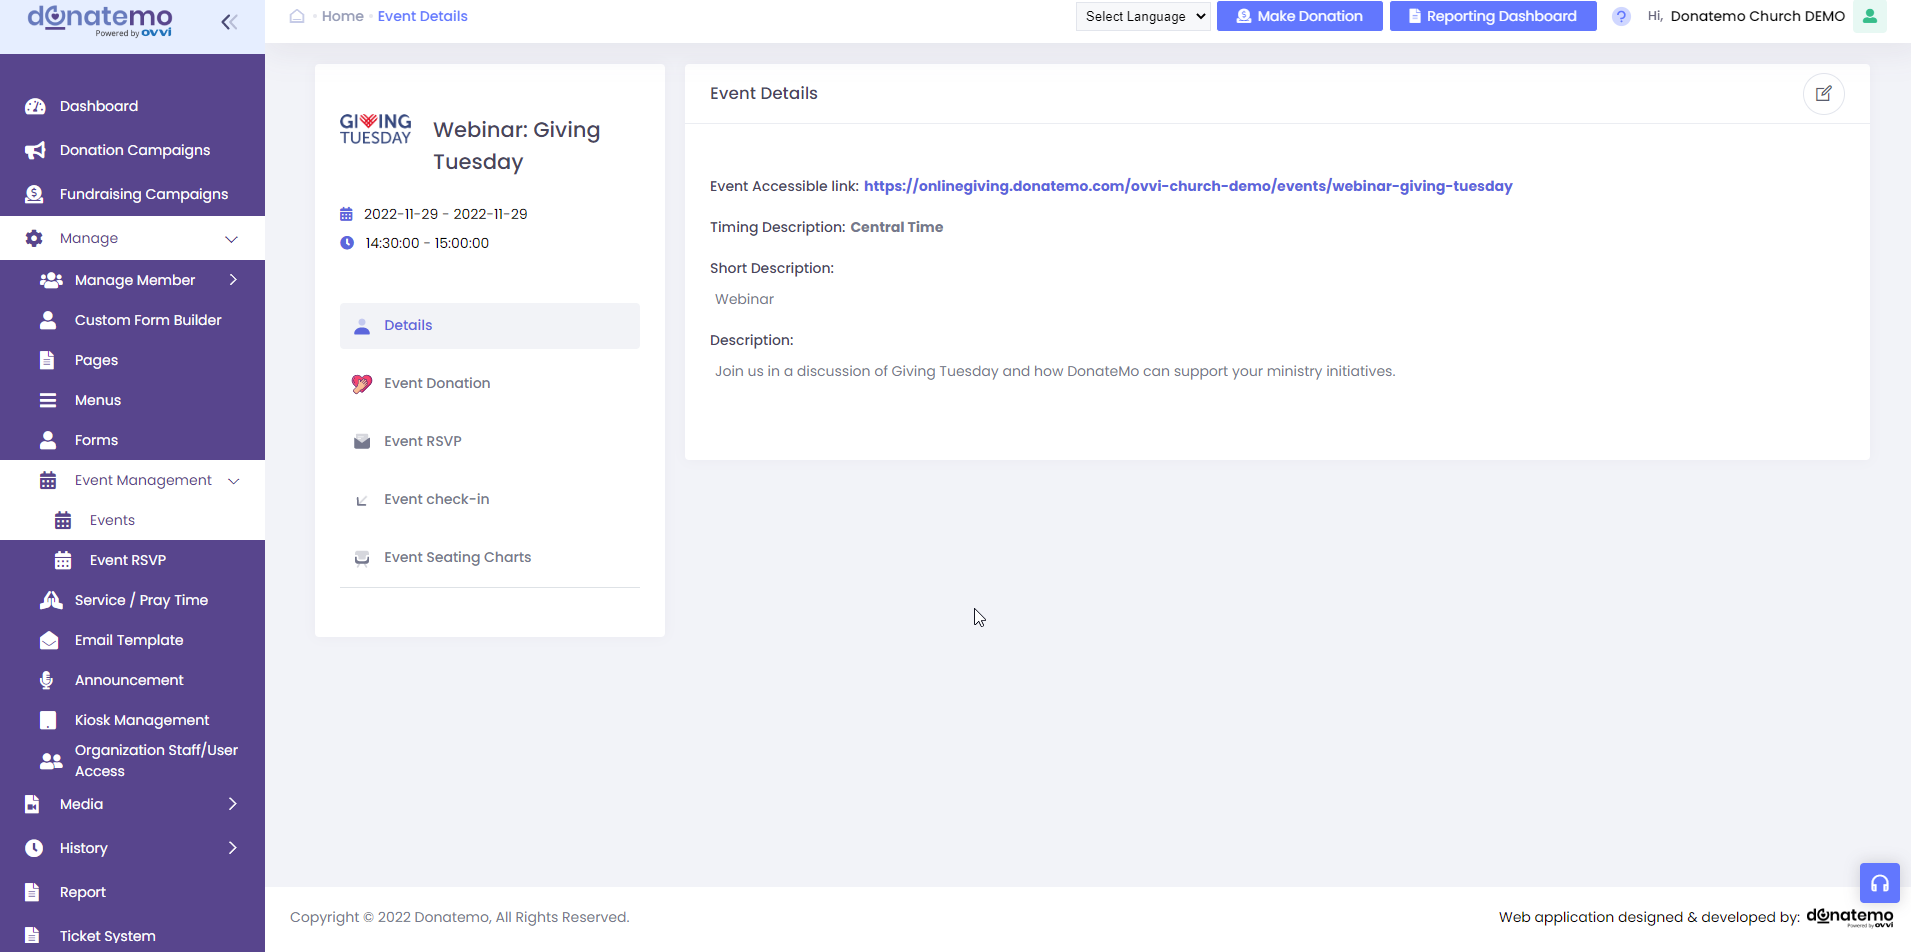
- On the event detail page there are all features are available like an event details, event donation, event RSVP, event check-in, event seating charts.
- Event details: event details tab information displayed like event accessible link, timing description, short description, description.
- Event donation: There are 2 Type of Link (Please refer the below screenshot)
- Create Event Donation
- Update Event Donation

- If you want to add Events then click on add event fill up all the requiredfields and then click on Save & Exit Events will get added in the grid.
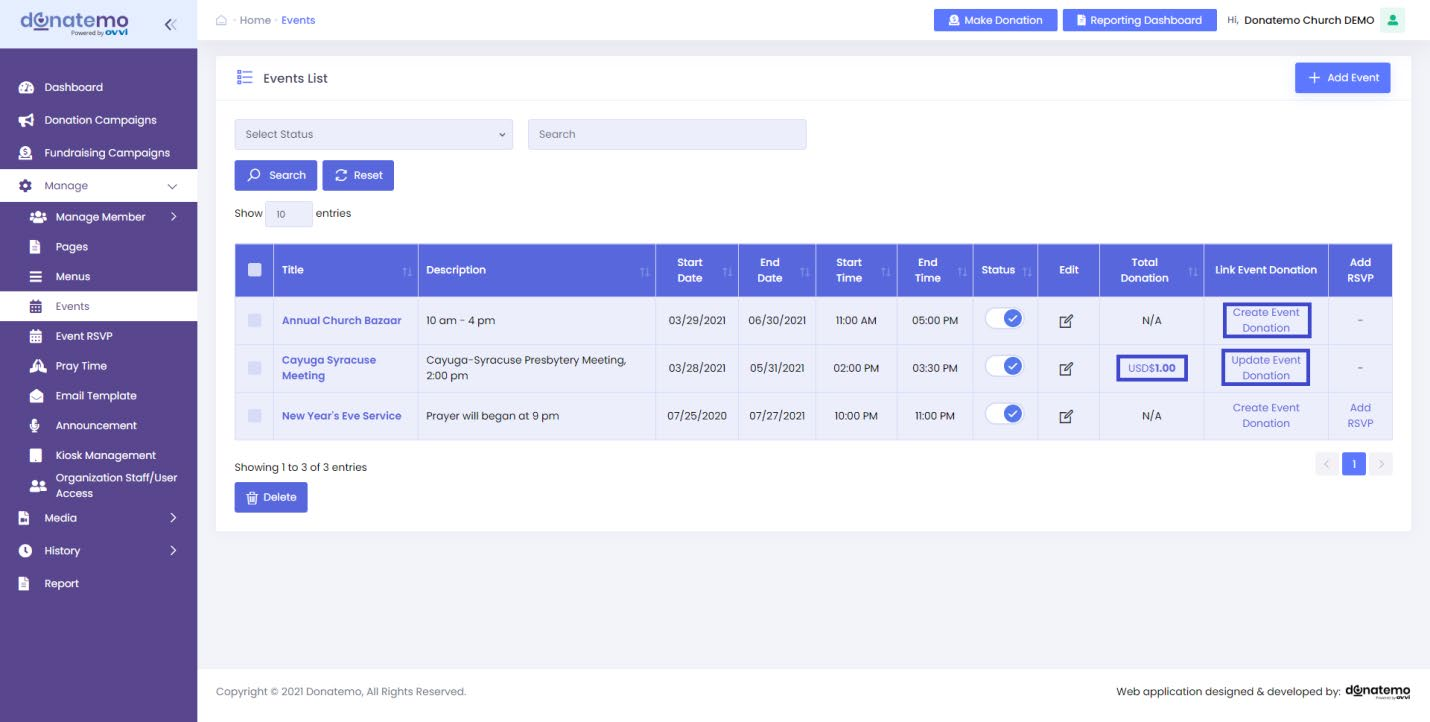
- In second last column of the grid we have shown “Link Event Donation” link,
- There are 2 Type of Link (Please refer the below screenshot)
- Create Event Donation
- Update Event Donation
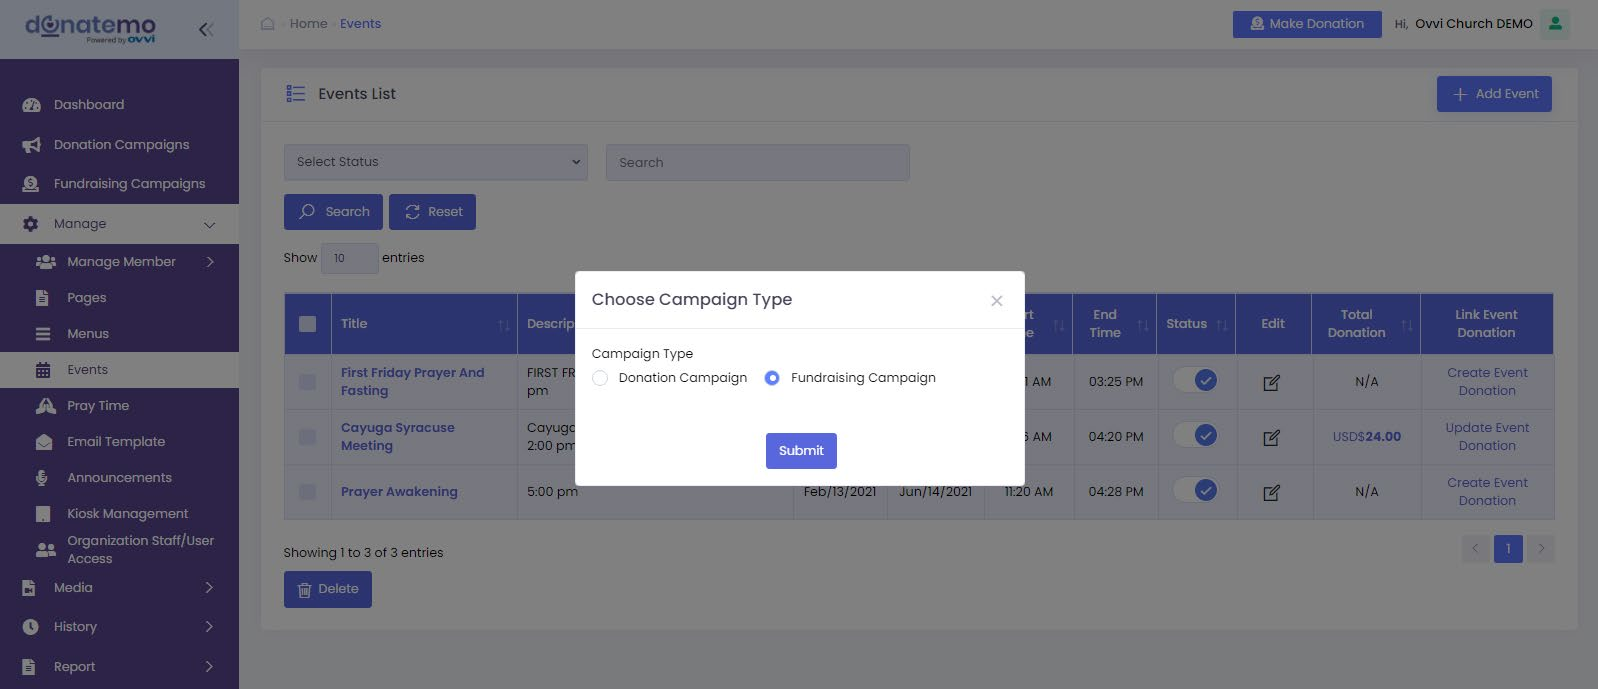
- When you add any event in second last column of the grid it will by defaultshow Create Event Donation when you click on that at that time it will showpopup with two option i.e Donation Campaigns And Fundraising Campaigns you have to select any of the option and it will direct to page respectively.
- After creating the Event donations the text will get updated as Update thedonation and when you link on that you can also update that eventdonation
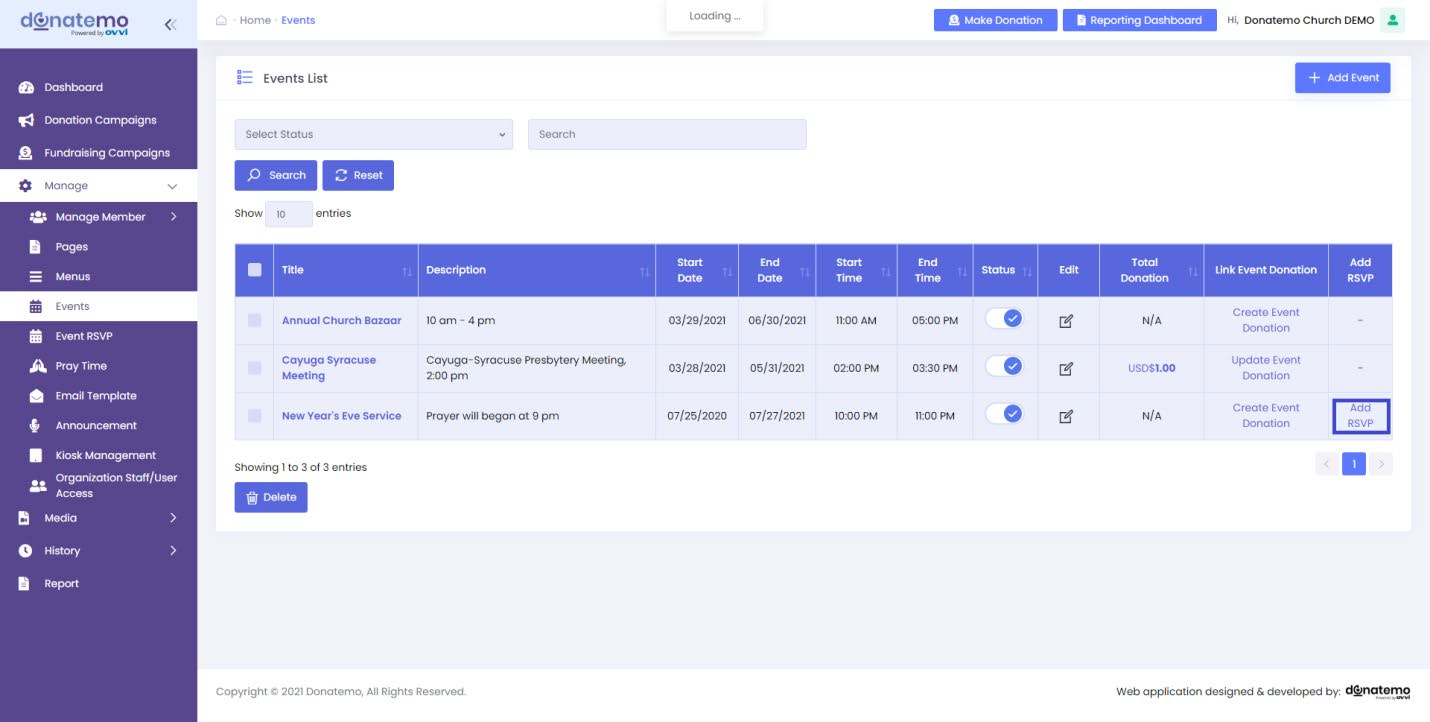
- On events grid last column there is an option for “Add RSVP” for specificevent.
- After click on “Add RSVP” it will redirect to add RSVP page, you can createRSVP for specific event.
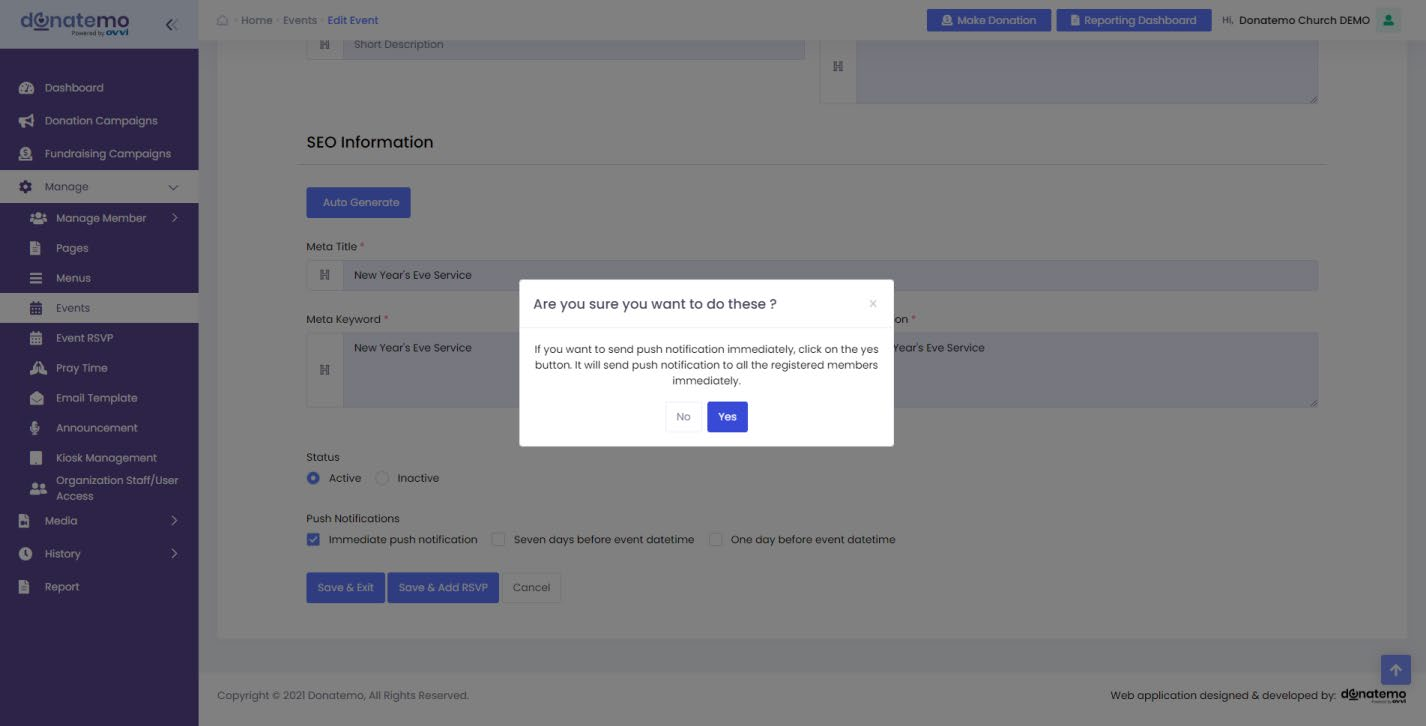
- When you save any event above Save & Exit button there is one featurei.e Push Notification if you select any of the below three option then popup will get open if you will click on the “Yes” button then you will receive push notification in mobile if no then you won’t receive any update.(Please refer to the below screenshot)

- You can also create a RSVP when save an event, after fill the details of anevent then click on the “Save & Add RSVP” button redirect to RSVP addpage. All event details are filled up on RSVP add page you can edit or keep same as an event details for create a RSVP.
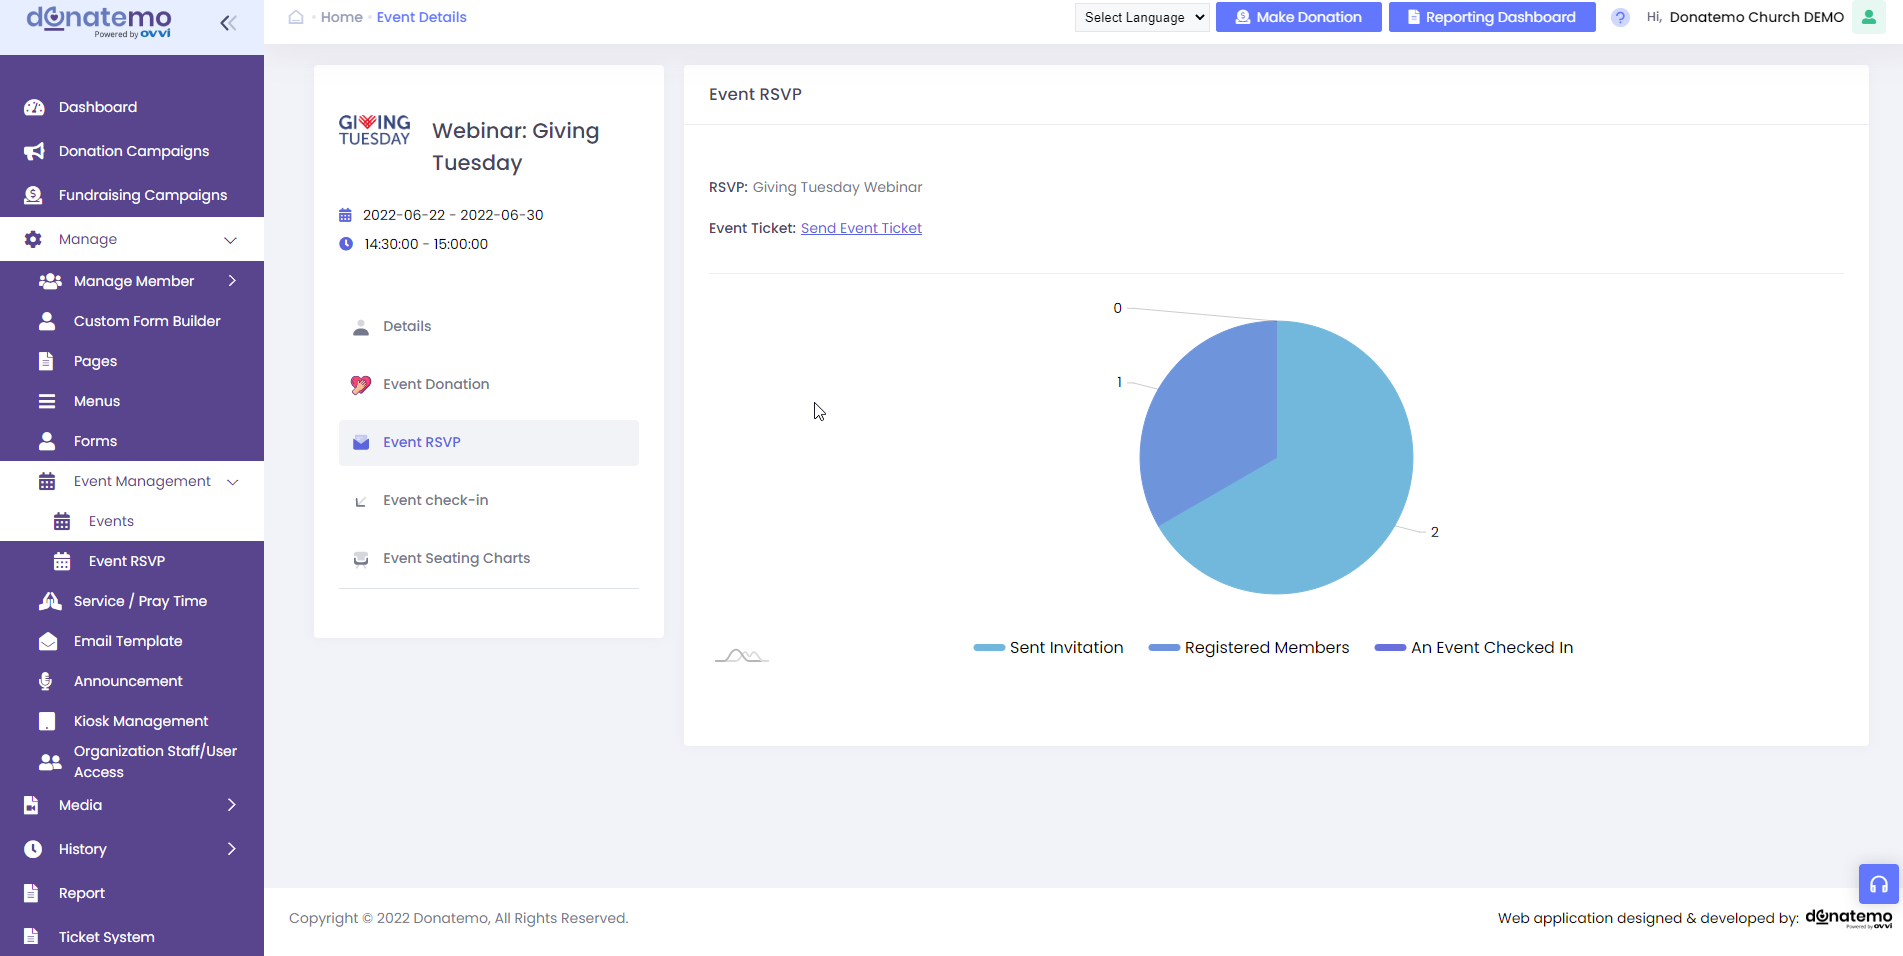
- Event RSVP: On the event RSVP tab, there are displayed the information related to an event RSVP.
- There is option to send an event ticket to member for invite the member on an event.
- On the graphical representation of an event RSVP there are information displayed like sent invitation, registered members, an event checked-in.
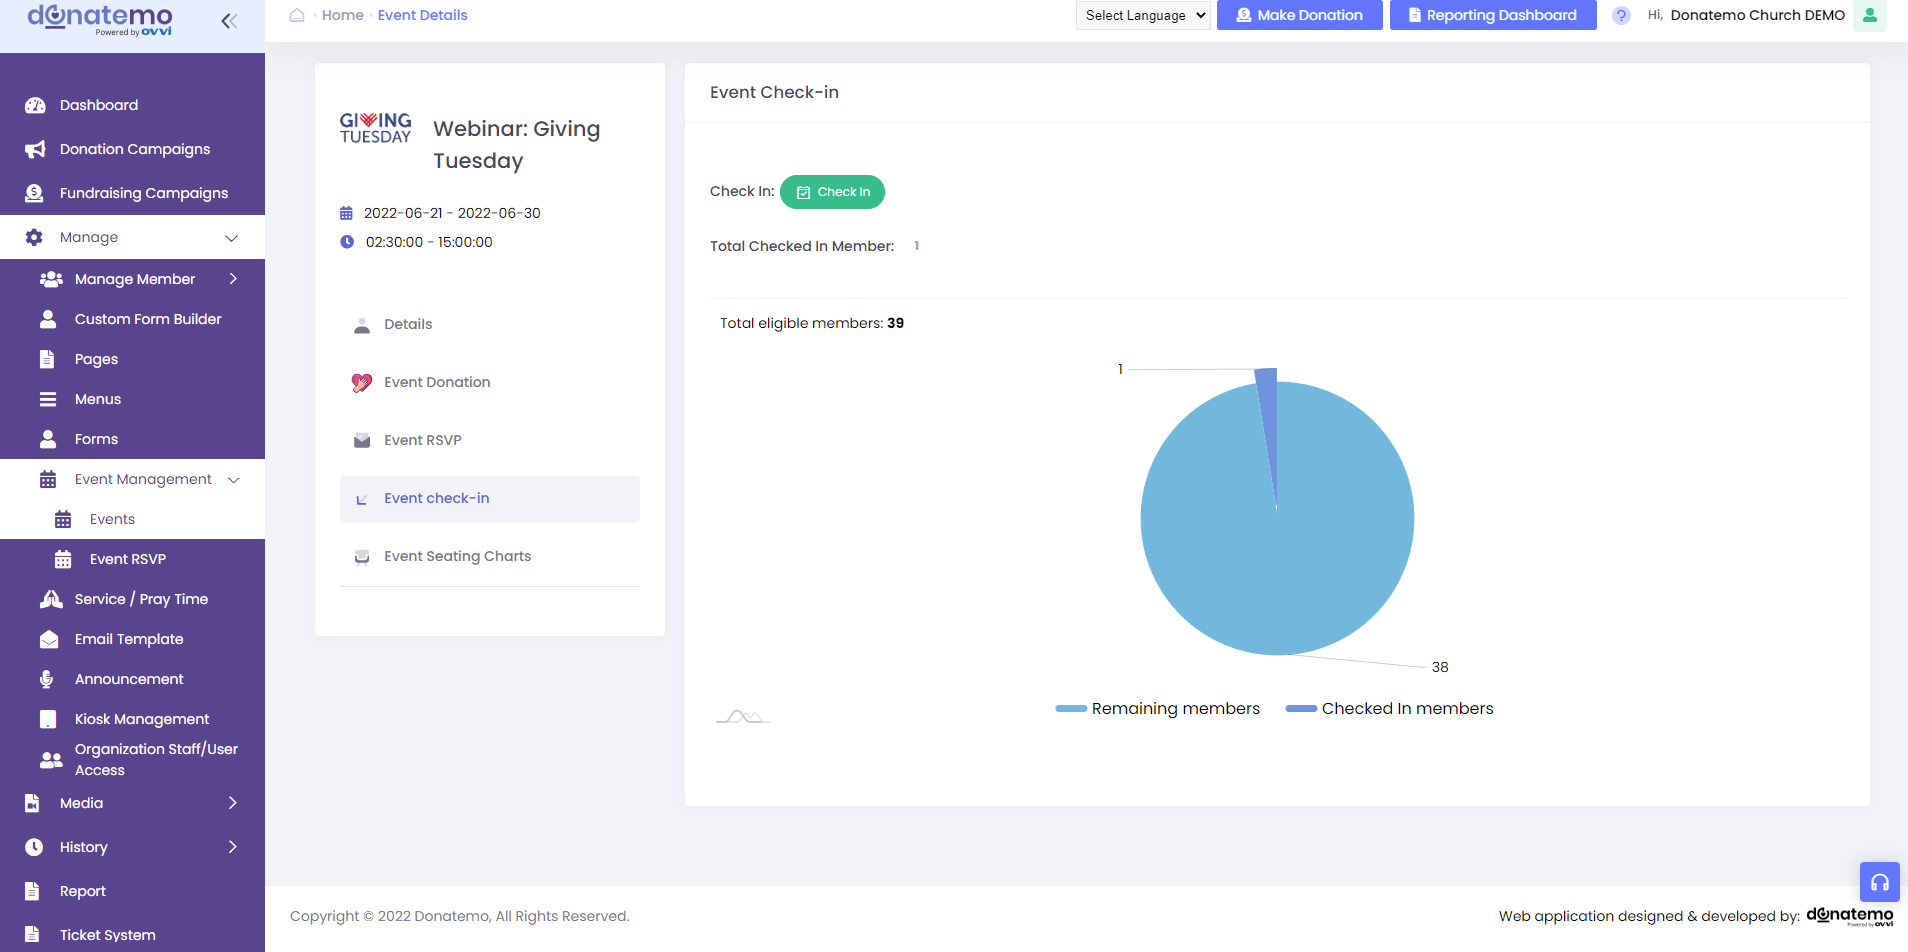
- Event check-in: On this tab displayed the information for an event checked-in.
- There is button visible for an event check-in when an event will start.
- There is displayed the total number of checked-in member for an event.
- On the graphical representation for an event check-in displayed the total checked-in members and total remaining members for an event check-in.
- On the hover of the graph there is link will be visible for accessing the report of the checked-in members.
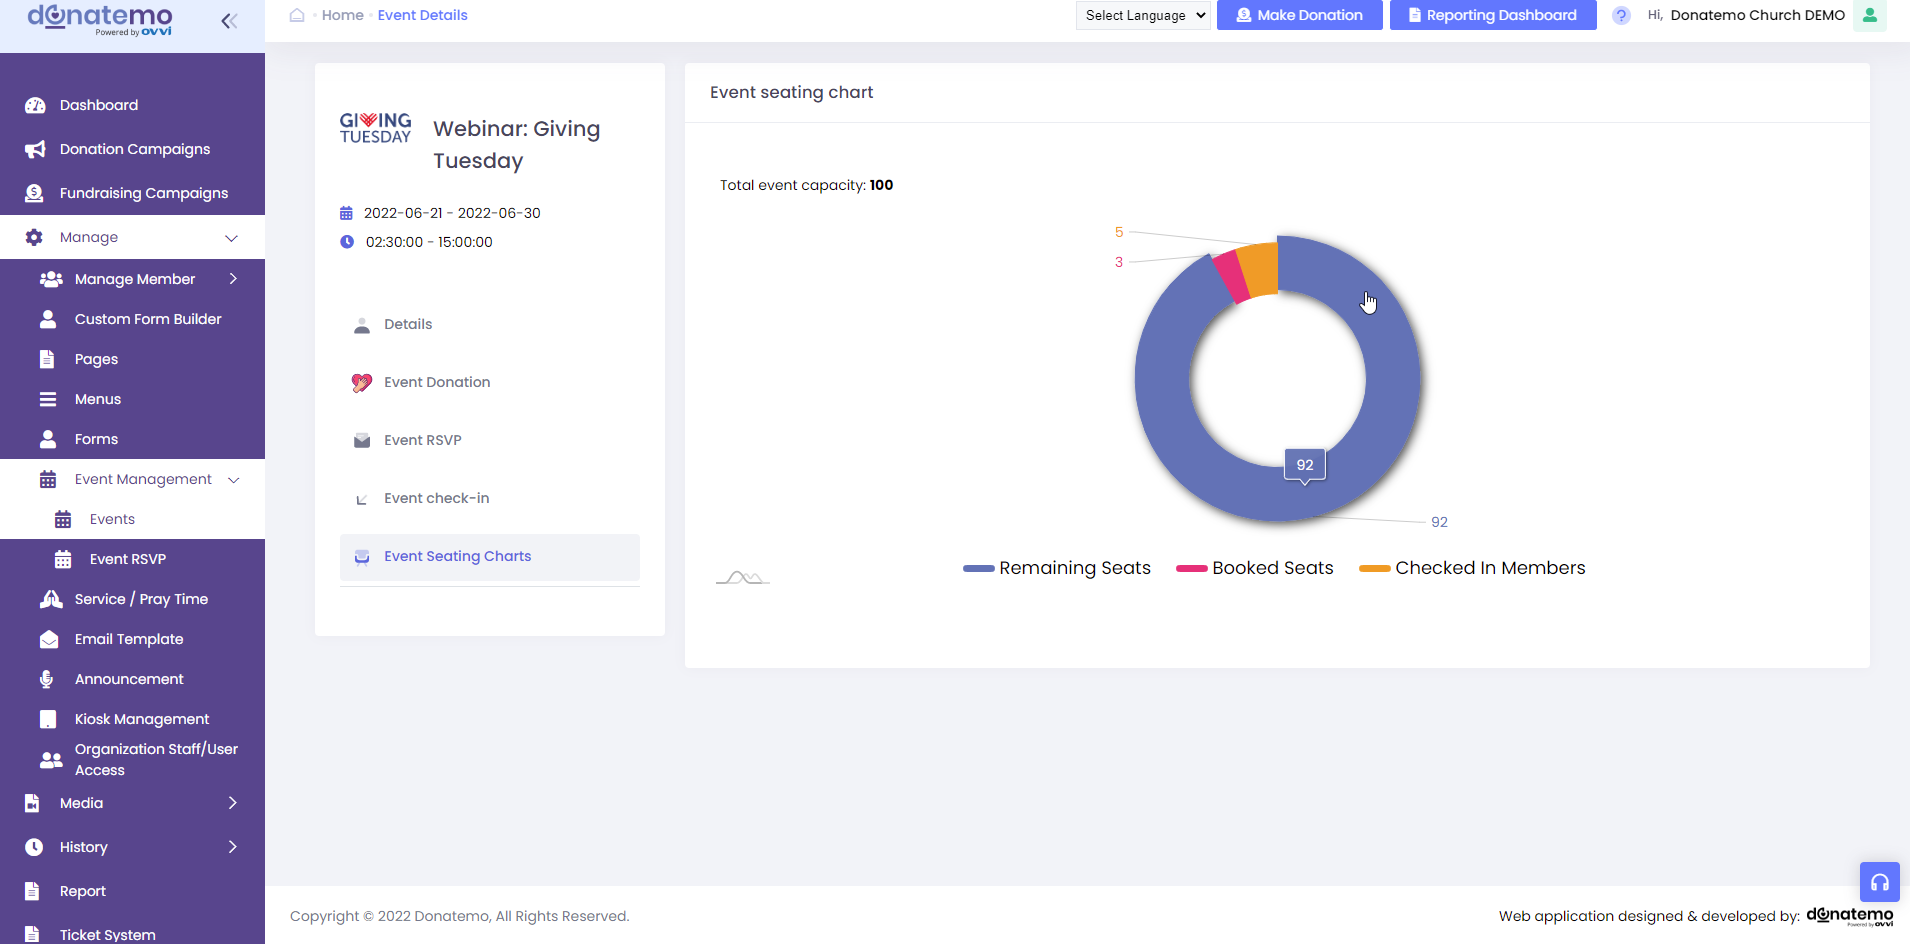
- Event seating charts: There is graphical representation for an event seating charts, and displayed the information like remaining seats, booked seats, checked-in members.
- There is displayed the information of total event capacity.