- Back Office
- Church Management
- See as per below screenshot there are video lists shown with title.
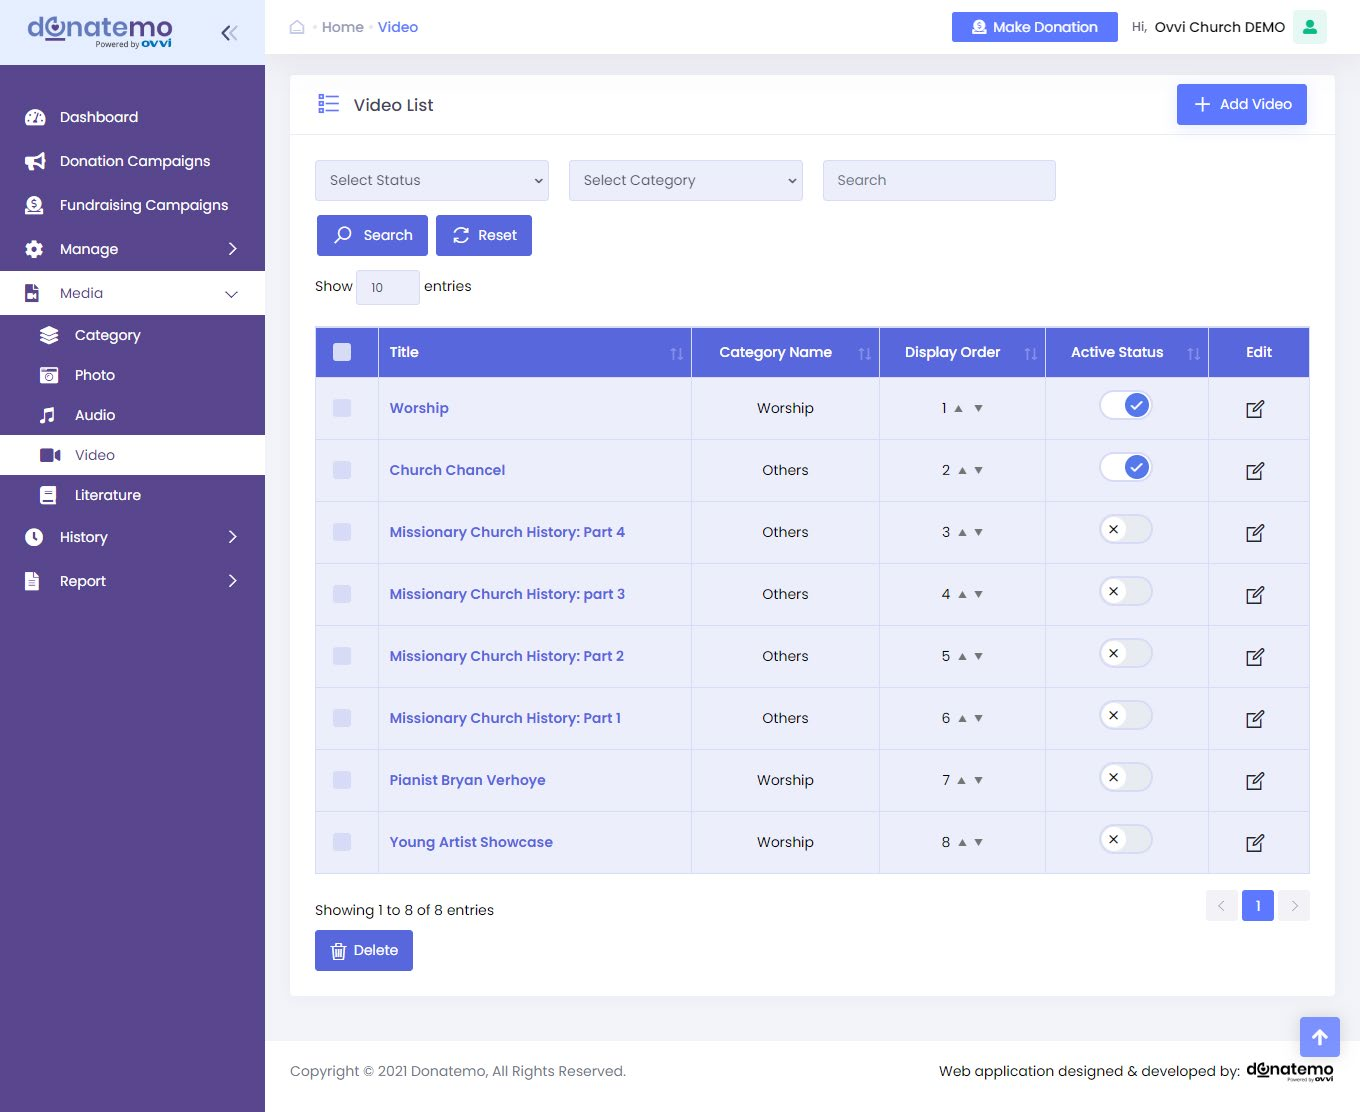
- In the upper right corner of the screen there is “add video” button, after clicking this button it redirects to add video page.
- In this page there are three filters for lists.
- Active/inactive filter:- it’s filter by active status list column.
- Select category filter:- It’s Search filter by video category.
- Text input filter:- It’s Search filter with text input by video title.
- We display order functionality in the video list.
- We can change the display order of video using up and down arrow.
- We can add a video name column to identify the category of video.
- In the list we can active /inactive the video from list, edit icon which redirects to edit video page & also it has functionality of deleting multiple videos.
- After clicking the “Add Video” button, screen looks like below.
Advance Setup:
1. Enable custom amount :- This is basically used for custom amount when payment for the donation has been done. If the checkbox is checked then custom amount text will be shown otherwise not.
2. Interval of donation :-
This is basically used for selecting Interval of donations. Are you going to donate every day, weekly, monthly or annually for listing in recurring payment option. If any of the checkbox is not selected then it will not get listed in the recurring payment option.
After selecting the interval checkbox drop down will get open and you have to enter the minimum and maximum amount of donation for that particular interval and it will get deducted from your account automatically on the basis of the interval selected.
3. Extra form fields :-
- Select Where you want to display this campaign ,
- And other fields added like a particular date, leave a comment,
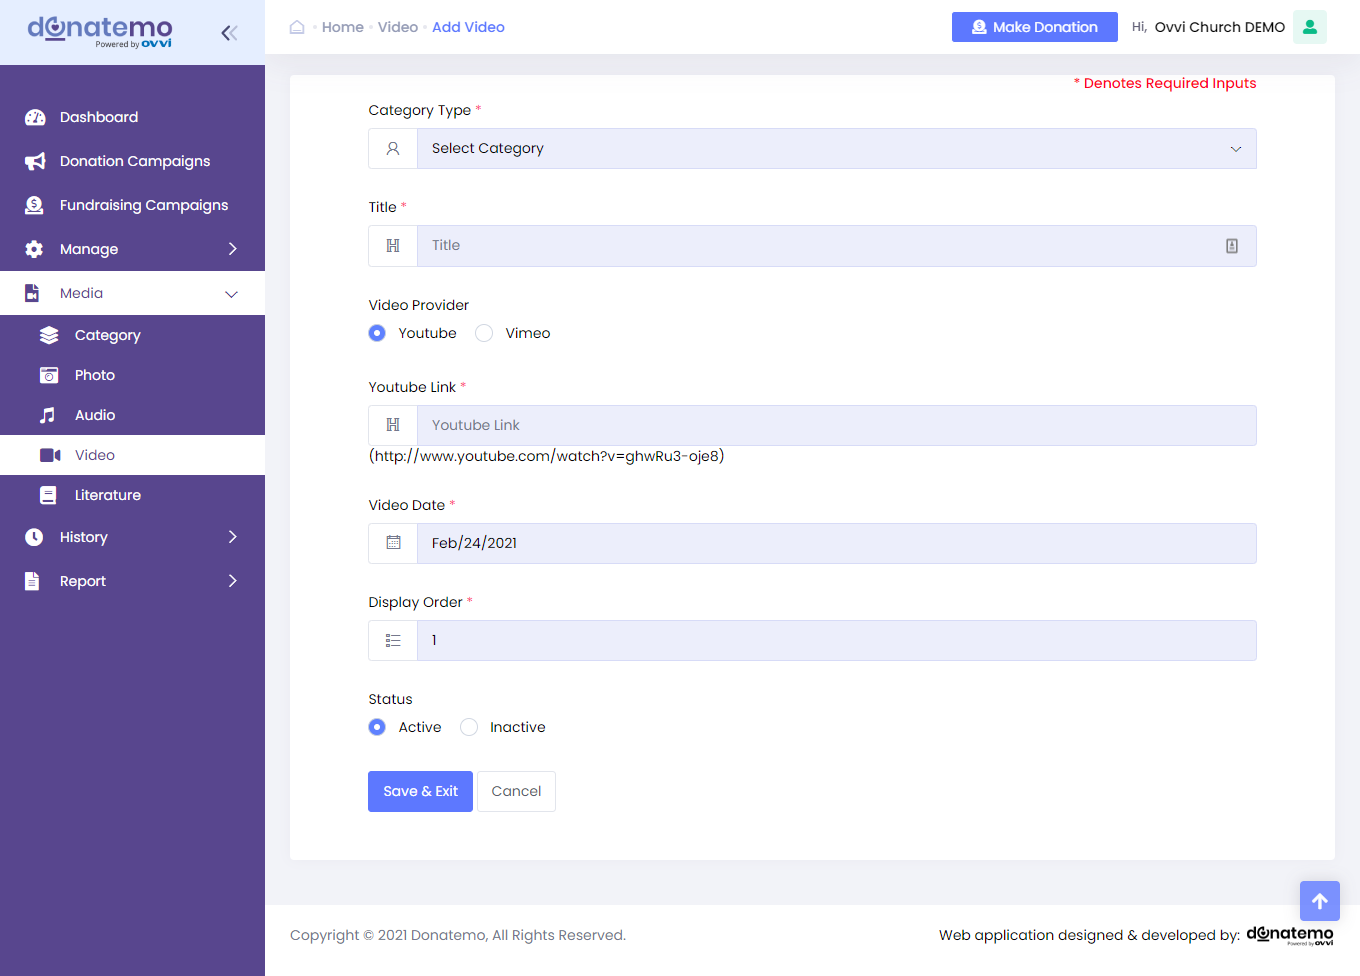
- See this above screen, it has a select category type, title, video link, video date, display order, and active/inactive status to add video.
- In the Video Provider, there are two options available.
- YouTube
- Vimeo
- After filling, all the data click on the “Save & Exit” button. So, a new video has been created successfully.