- Back Office
- Church Management
- The kiosk management module will not appear in the left panel list, if kiosk
add-on is not purchased. - As per below screenshot there is Kiosk Management, lists are shown.
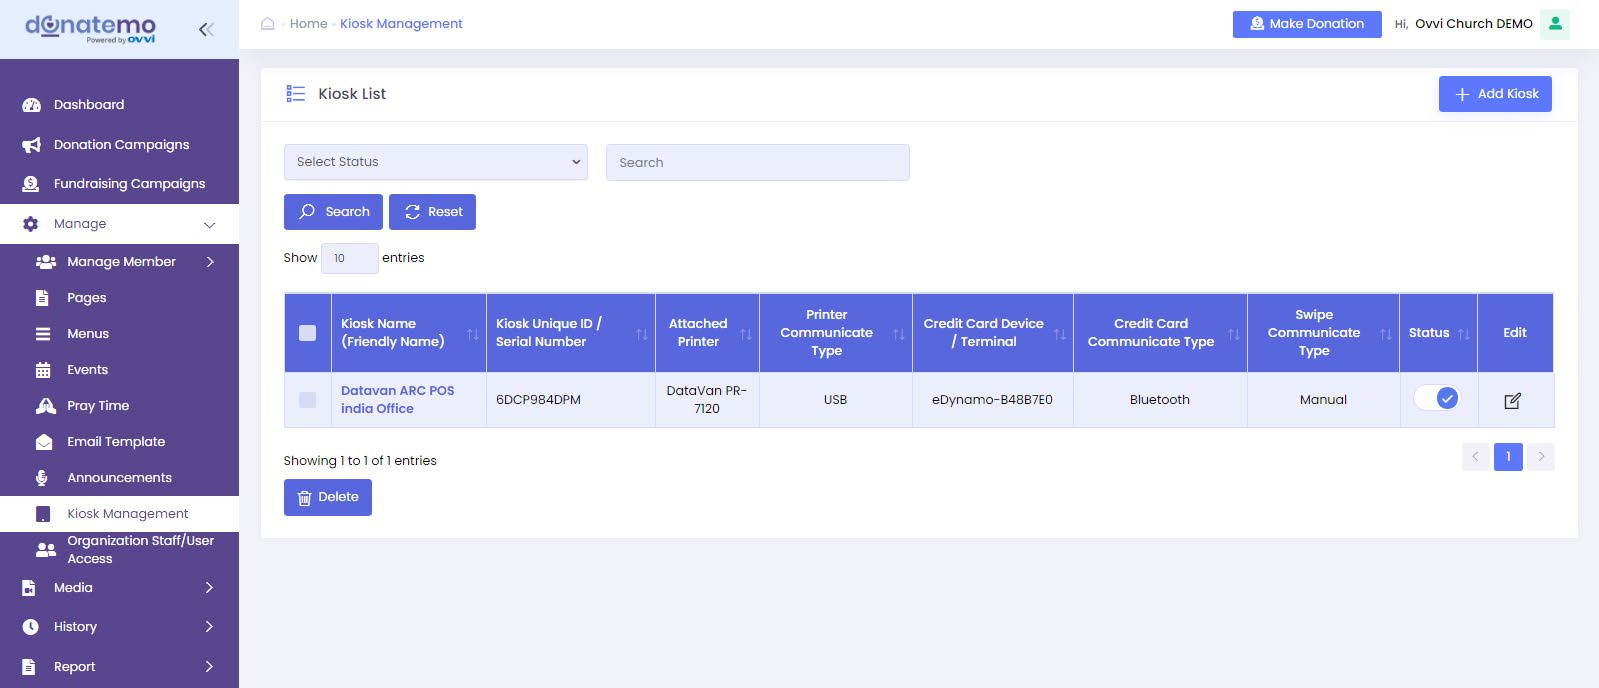
- In this screen upper right side corner there is an “Add Kiosk” button.
- After clicking on the “Add Kiosk” button it will redirect to add kiosk page.
- Below of these filter there are two more filters shown
- Active or inactive status filter: filter by active or inactive kiosk list
- Search by text filter: filter by text input in list by column like Kiosk
Name.
- As per below screenshot there is an add kiosk page is shown.

- We have explained each field below:
- Kiosk Name: Add the Kiosk name which displays as title (Required)
- Kiosk Unique Id/ Serial Number: Add the Kiosk unique Id/ Serial
Number. (Required) - Attached Printer: Select the printer with which you want to attach
with kiosk.- Attached Printer list are below:
- Epson TM-T20
- SNBC BTP-R180 II
- ATPOS HOP-E200
- DataVan PR-7120
- Attached Printer list are below:
- Printer Communication Type: Select the communication type with
which you want support in the printer.- Communication Type list are below:
- USB
- Bluetooth
- Wi-Fi
- Communication Type list are below:
- Credit Card Device/Terminal: Select the credit card device
(Optional)- Communication Type list are below:
- eDynamo
- eDynamo-B48B7E0
- Communication Type list are below:
- Credit Card Communication Type: Select credit card communication
type which you want support in credit card.- Communication Type list are below:
- USB
- Bluetooth
- Wi-Fi
- Communication Type list are below:
- Swipe Method Type: Select the swipe method type, in which you
can select in the terminal. - Select number of receipt print option: Select the number of receipt
prints in which you want more than one receipt. - Select Offline Payment Option: Select Any one or Both Payment
option,- Payment Option list are below:
- Cash
- Check
- Payment Option list are below:
- Show Address: If You Checked in the “Show Address” checkbox,
Address will be shown in the kiosk app. - Upload Receipt Logo: Upload kiosk Receipt logo which you display
or use in receipt. - Status: active/inactive by default it’s active
- After clicking on the “Save & Exit” button, you have added a Kiosk
successfully and redirected to the Kiosk list. - Note: You have only One Kiosk addon available in your existing plan. Go
to the billing information tab in the Organization setting page and Purchase
add more kiosks